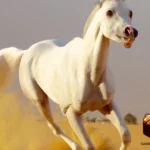
As we set our eyes on the majestic camel with its rugged fur, towering height, and strong features, we can’t help but feel captivated. However, capturing these magnificent creatures through photography takes more than just a camera and a location. Lighting plays a critical role in enhancing the beauty and character of camels in photography. But with so many lighting options available, where do we begin? Let’s explore the nuances of lighting for camel photography and discover some tips and tricks for capturing stunning camel portraits.
Contents
- Understanding lighting for camel photography
- Pre-shoot Lighting Preparation
- How to capture stunning camel photos with lighting
- Post-processing your camel photos
- Tips and Tricks to Enhance Your Camel Photography with Lighting
- Conclusion
-
Frequently Asked Questions
- What type of lighting is best for camel photography?
- Can I use artificial light for camel photography?
- How do I check the weather for a camel photography shoot?
- What is the best time of day to photograph camels?
- What is color temperature and why is it important?
- Why is white balance important in camel photography?
- What is the best way to use shadows in camel photography?
- How can I experiment with backlighting in camel photography?
- What is a reflector and how can it enhance camel photography?
- Should I always turn off the flash in camel photography?
- References
Understanding lighting for camel photography

When it comes to capturing stunning camel photos, proper lighting can make or break the shot. Finding the right lighting sources, direction, and color temperature can greatly enhance your photos and bring out the beauty of these majestic creatures. In this section, we’ll delve into the intricacies of lighting in camel photography and how to use it to your advantage. Whether you’re a seasoned photographer or just starting out, understanding lighting is crucial to taking breathtaking camel photos. So, let’s explore the different aspects of lighting in camel photography and learn how to make the most of it. If you’re interested in exploring more about camel photography, check out Camels in Photography for a broader perspective.
Lighting sources
Understanding lighting sources is an essential aspect of camel photography. Some common lighting sources used in photography include natural light, artificial light, and flash. Each lighting source comes with its own unique advantages and challenges, and choosing the right lighting source is crucial to achieving the desired effect in your camel photos.
Here’s a breakdown of each type of lighting source:
| Natural Light | Artificial Light | Flash |
|---|---|---|
| Natural light is the most popular lighting source in photography. It includes sunlight, moonlight, and other light generated by natural sources. Natural light can create a range of effects based on the time of day and location. | Artificial light includes any lighting source that isn’t natural. It can be incandescent, fluorescent, or LED. Artificial light gives photographers more control over lighting conditions, but it can also look less natural than natural light. | Flash is a type of artificial light that is used to supplement or replace natural light. It comes in both built-in and external forms and can be used in conjunction with other lighting sources to create a specific effect. |
By understanding the characteristics and limitations of each type of lighting source, photographers can use the lighting to the best advantage to capture stunning camel photos. For more information on camel photography, check out our article on camel photography in the Middle East.
Lighting direction and angle
When it comes to lighting direction and angle, it can dramatically change the mood of the photo and enhance the details of the camel. Different angles and directions can create shadows, highlights, and depth in the photograph. Here are some tips for using lighting direction and angle in camel photography:
| Lighting Direction | Result | Recommended Time |
|---|---|---|
| Front lighting | Evenly lit camel with minimal shadows. Helps to showcase details and colors. | Any time of the day |
| Side lighting | Creates shadows and highlights, highlights the textures, and accentuates the shape of the camel. | Early morning or late afternoon |
| Backlighting | Creates a silhouette of the camel, making it stand out from the background. | Sunrise or sunset |
| Top lighting | Highlights the top part of the camel, creating depth and dimension. | Midday |
| Bottom lighting | Creates shadows and highlights on the belly of the camel, producing a unique perspective. | Anytime during the day with low angle |
Remember, the direction and angle of the lighting can make or break your photo, so it’s essential to experiment with different lighting positions to achieve the desired result. Try exploring different perspectives and angles to create a unique camel portrait. Some famous photographers have also captured breathtaking camel photos by using creative lighting effects, so don’t hesitate to try something new and unconventional.
Color temperature and white balance
Understanding color temperature and white balance is crucial for capturing stunning camel photos with the right lighting. Color temperature refers to the warmth or coolness of the light source, measured in Kelvin (K). Lower Kelvin values create a warmer, orange/red light while higher Kelvin values produce a cooler, blue/white light.
Proper white balance is necessary to ensure that the colors in your photo look accurate and natural. White balance is the adjustment of colors in an image so that white appears to be white. If the white balance is off, the image may appear too warm or too cool.
To adjust the white balance on your camera, you can use presets such as daylight, cloudy, or shade, or you can manually adjust the white balance by using a white or gray card for reference.
Here is a table showing the different color temperatures of common light sources:
| Light Source | Color Temperature (Kelvin) |
|---|---|
| Sunlight | 5500K |
| Cloudy sky | 6000-7000K |
| Shade | 8000-9000K |
| Fluorescent lights | 3500-4000K |
| Incandescent lights | 2500-3000K |
Understanding color temperature and white balance will allow you to capture camel photos with accurate color representation and the desired warm or cool tones. It is essential to consider the lighting conditions and adjust the settings accordingly to achieve the optimal white balance.
Pre-shoot Lighting Preparation
As you prepare for a camel photography shoot, it is important to understand the role of lighting in capturing stunning photos of these majestic animals. Proper lighting not only enhances the beauty of the camel but also adds depth and dimension to your photos. It is crucial to make necessary pre-shoot lighting preparations to ensure that you get the perfect shot. In this section, we will discuss some key preparations to make before embarking on your camel photography adventure. Whether you’re shooting camel portraits or capturing camels in the wild, these tips will come in handy. So, let’s dive in and get ready to take some amazing camel photos! For more inspiration, check out these stunning photos of camels.
Scouting Locations
Scouting Locations:
Finding the right location is a crucial step for getting the best possible camel photos. Scouting locations in advance can help you save time and improve the overall quality of your photographs. Here are some tips for scouting the perfect location for camel photography:
- Look for a place where camels are easily accessible, such as a zoo or a wildlife park. If you are planning to take pictures in the wild, make sure to do your research and find out where wild camels can be found.
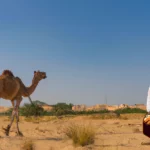
- Consider the background of your photo. Look for a location with an interesting and balanced background that will complement your subject. For example, if you are going for a natural look, a sandy desert background could be an ideal choice.
- Take note of the position of the sun. Shooting during the golden hour – the first and last hour of sunlight – can make a huge difference in the quality of your photos. Look for locations where you can take advantage of natural light and avoid harsh, mid-day sun.
- Watch out for potential distractions in your background such as litter, other animals or people that could ruin your photo. Avoid locations that may lead to distractions in your final image.
- If you’re a professional photographer, it’s always great to research famous photographers who have captured amazing images of camels in various locations. You can get inspiration and ideas on how to get the best shots by studying their work. Check out our article on famous photographers who captured amazing camel photos for more information.
By scouting the right location ahead of time, you can minimize the guesswork and achieve great results.
Checking weather
Before heading out for a camel photography shoot, it’s important to check the weather. Bad weather conditions can ruin your chances of getting the perfect shot, so it’s essential to be prepared.
Here are some things to consider when checking the weather for your camel photography shoot:
- Cloud cover: If it’s a cloudy day, the light will be diffused and soft, which can be great for capturing detail and texture on the camel’s fur. However, if you’re looking for dramatic shots with shadows, you may want to wait for a sunny day.
- Wind: Wind can be a big factor when photographing camels. Not only can it make them restless, but it can also make it difficult to keep the camera steady. If the wind is too strong, it may be best to postpone the shoot for another day.
- Rain: Rain can be a major problem for camels, and it’s important to keep them and your camera gear dry. If rain is forecasted on the day of your shoot, it may be best to reschedule.
- Temperature: Camels are well-adapted to hot and dry conditions, but extreme temperatures can still be dangerous. It’s important to make sure you and the camels don’t overheat during the shoot.
- Time of day: The time of day can also affect the weather conditions and the quality of light. For example, early morning or late afternoon light can be warm and golden, while midday light can be harsh and unflattering.
By checking the weather beforehand and planning accordingly, you can ensure that your camel photography shoot is a success. For more tips on camel photography, check out our article on using camels in travel photography.
Choose the right time of day
Choosing the right time of day to shoot camel photography is crucial to getting the best lighting. The two best times of day to shoot camel photography are during the early morning and late afternoon. This time is often referred to by photographers as the “golden hour,” because the lighting is soft and warm. Shooting in the middle of the day should generally be avoided, as the lighting is too harsh and can cause unflattering shadows.
To illustrate the difference in lighting throughout the day, let’s take a look at this table:
| Time of day | Lighting quality |
|---|---|
| Early morning (just after sunrise) | Soft, warm, and diffused |
| Mid-morning to mid-afternoon | Harsh lighting with deep shadows |
| Late afternoon (just before sunset) | Soft, warm, and diffused |
As you can see, choosing the right time of day can greatly affect the quality of your camel photos. Shooting during the “golden hour” provides soft and warm lighting, which enhances the natural beauty of the camels. On the other hand, shooting during the middle of the day results in harsh lighting, which can cause undesirable shadows and a lack of detail.
To further enhance your camel photography during the “golden hour,” consider shooting with the sun behind you or to the side of you. This will provide stunning backlighting that will illuminate the texture and shape of the camel’s fur. Try experimenting with different angles to capture the perfect shot.
For more tips and tricks on other types of camel photography, check out our related articles on camel portrait photography, the history of camel photography, and camel wildlife photography.
How to capture stunning camel photos with lighting
Photographing camels can be a challenging task, but with the right lighting techniques, you can capture stunning photos that truly showcase their beauty. Proper lighting can enhance the texture of their fur, highlight their unique features, and add depth to your photos. In this section, we’ll explore the different techniques you can use to capture beautiful camel photos with the right lighting. From working with natural light to using flash to balance light, we’ll cover everything you need to know to get the perfect shot. So, let’s dive in and discover the tips and tricks to enhance your camel photography with lighting.
Using natural light
When it comes to camel photography, natural light is often the most preferable option. Here are some tips on how to use natural light to capture stunning camel photos:
- Golden Hour: The golden hour occurs during the first and last hours of sunlight each day. During this time, the light is soft and warm, creating a flattering glow on the camel’s coat.
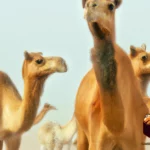
- Capturing Texture: When photographing camels, it’s important to capture the texture of their coat. To do this, position the camel so the light is hitting them from the side, creating shadow and depth.
- Backlighting: Backlighting your subject can create a stunning and unique effect. Place the camel between the camera and the sun, with the sun’s rays illuminating their outline. This creates a halo effect around the camel and accentuates their silhouette.
- Avoid Direct Sunlight: Harsh direct sunlight can cast unflattering shadows and create blown-out highlights. If photographing during the middle of the day, find a shaded area or create your own shade using a diffuser to soften the light.
- Reflective Surfaces: Utilize reflective surfaces to bounce light onto the camel. This will help fill in any harsh shadows and create a more even exposure.
By using natural light effectively, you can capture stunning camel photos that showcase the beauty and texture of these unique animals.
Using artificial light
One of the best ways to enhance camel photography with lighting is to use artificial light. This is particularly useful when capturing photos indoors, during low light conditions, or when there is no natural light available.
There are several types of artificial lighting options available for camel photography, with each option having its own advantages and disadvantages. The most common types are continuous lighting, strobe lighting, and LED lighting.
Continuous lighting provides a constant source of light while the photo is being taken, making it easy to see the lighting and adjust it as needed. This is why it is often used in video production. However, continuous lighting can produce a lot of heat, which can cause discomfort to the camels and the people around.
Strobe lighting, also known as flash, is the most commonly used artificial light in photography. It provides a quick burst of light lasting for a few milliseconds, creating a very bright light source. Strobe lighting is ideal for capturing action shots and is commonly used in studio photography. However, strobe lighting can be distracting to some animals, including camels.
LED lighting, on the other hand, is an energy-efficient option that provides a brighter and cooler light source compared to other options. It produces less heat, making it comfortable for both the photographer and the subject. LED lighting is also easier to adjust and control, and can be modified to mimic natural light conditions.
When using artificial light, it is important to pay attention to the direction and angle of the light. Positioning the light correctly will not only create dramatic and stunning effects on the camels, but it can also help to minimize shadows and highlight the important features of the subject.
It is also essential to keep in mind the color temperature and white balance of the light source. Different light sources have varying temperatures that can affect the color tones of the resulting photos. White balance adjustment will ensure that the colors of the photo stay true to life.
Using artificial lighting can greatly enhance camel photography by providing consistent and controlled light sources. By choosing the right type of artificial light, paying attention to the direction and angle of the light, and understanding the color temperature and white balance, photographers can capture stunning and memorable photos of these magnificent animals.
| Artificial Lighting Type | Advantages | Disadvantages |
|---|---|---|
| Continuous Lighting | Easy to adjust, provides constant light source | Produces a lot of heat, can be distracting for some animals |
| Strobe Lighting | Provides quick burst of light, ideal for action shots | Can be distracting for some animals |
| LED Lighting | Energy-efficient, cooler light source, easier to adjust and control | Costs more upfront |
Using flash to balance light
When photographing camels in low-light situations, one effective way to balance the light is by using a flash. However, using a flash requires a delicate approach to ensure that the lighting looks natural and doesn’t create unwanted shadows, highlights, or reflections. Here are some essential tips to help you effectively use a flash when photographing camels:
| Tip 1: Diffuse the flash |
| Softening the flash output will diffuse the light, making it more natural and avoiding harsh shadows. You can do this by using a diffuser attachment, bouncing the flash off a nearby surface, or using a thin white cloth or tissue paper to cover the flash. |
| Tip 2: Adjust the flash power |
| Test the flash by taking test shots at different flash power levels to see how they look. Adjust the power until you get the desired level of brightness on the camel without causing overexposure or underexposure. |
| Tip 3: Use the flash as a fill light |
| When photographing a camel in bright sunlight, you can use the flash as a fill light to lighten any harsh shadows on the camel’s face or body. This technique is called “fill flash” and works by balancing the natural light with the flash, creating a well-exposed image with even lighting. |
| Tip 4: Consider the distance and angle of the flash |
| When using a flash, be mindful of the distance between the flash and the camel. It’s also important to consider the angle of the flash in relation to the camel. You may need to adjust both to get the optimal lighting effect. For instance, if the flash is too close, it can cause red-eye or washed-out colors. |
Remember, using a flash is just one technique to balance the light when photographing camels. Experiment with different approaches to find the perfect lighting for each shot.
Post-processing your camel photos
After a successful camel photography session, the real work begins with post-processing. Enhancing the colors, reducing noise, and sharpening the image can all take your camel photos to the next level. However, it’s important to approach post-processing with caution, as it’s easy to go overboard and create an unnatural-looking image. In this section, we’ll discuss some tips on how to post-process your camel photos to bring out their best qualities while maintaining a natural appearance.
Color Correction
Color correction is an essential step in post-processing your camel photos. It involves adjusting the colors in an image to make them look more natural and true to life. Here are some tips for effective color correction:
- Use a color reference – Before making any adjustments, it’s helpful to have a reference for accurate colors. You can use a color chart or a neutral gray card to establish a baseline for color accuracy.
- Adjust the white balance – White balance affects the overall color temperature of an image. If the white balance is incorrect, the entire photo may appear too warm or too cool. Adjust the white balance to make sure that colors look natural and pleasing to the eye.
- Correct color cast – Sometimes, an image will have an unwanted color cast, such as a greenish tint caused by fluorescent lighting. One way to correct this is by using the eyedropper tool in your editing software to select a neutral gray area in the image, which should remove the color cast.
- Adjust saturation and vibrance – Saturation refers to the intensity of colors in an image, while vibrance adjusts the intensity of the less saturated colors. Adjusting these settings can give your camel photo more impactful colors.
- Make local adjustments – Sometimes, specific areas of an image may need additional color correction. You can use tools like the brush tool or adjustment layers to make local adjustments where needed.
By taking the time to perform color correction on your camel photos, you can create images that look more realistic and visually pleasing.
When it comes to post-processing camel photos, sharpening and noise reduction are two important steps that should not be overlooked. Here are some tips and tricks to keep in mind while editing your camel photos:
- Apply sharpening selectively: While sharpening can help bring out details in your photo, it should be used with care. Avoid over-sharpening, as this can result in unpleasant artifacts and make the photo look unnatural. Instead, apply sharpening selectively to certain areas of your photo that need it, such as the camel’s eyes or fur.
- Use the right tool: There are many tools available for sharpening in post-processing software, such as Lightroom or Photoshop. Choose the tool that works best for you and use it to make subtle adjustments to your photo.
- Reduce noise without sacrificing detail: Noise reduction is essential in low light situations, as it can help reduce the graininess in your photo. However, be careful not to overdo it, as this can result in a loss of detail. Use noise reduction selectively and test different settings to find the right balance.
- Use masking to apply adjustments selectively: Many post-processing tools offer masking features that allow you to apply adjustments selectively to certain areas of your photo. This can be useful for sharpening and noise reduction, as it allows you to make targeted adjustments without affecting the entire photo.
- Check your photo at 100% zoom: When making adjustments to your photo, be sure to check it at 100% zoom to ensure that you’re not introducing any unwanted artifacts or losing detail. This can help you make more accurate adjustments and produce a higher quality final product.
By following these tips and using the right tools in your post-processing software, you can effectively sharpen your camel photos and reduce noise without sacrificing detail.
Using filters to enhance the photo
Filters can be a powerful tool in enhancing your camel photography. With the right filter, you can add visual interest, correct color balance, and bring out the texture of the camel’s fur. Here are some tips for using filters to enhance your camel photos:
- Polarizing filter: A polarizing filter can reduce reflections and glare on shiny surfaces, such as the camel’s fur or the sand they’re standing on. So if there’s a glare on the camel’s fur, you may want to consider using a polarizing filter. It can also deepen the blue in the sky, making it more vibrant and contrasty with the camel’s fur.
- Neutral density filter: If you’re taking photos during midday, when the sun is high in the sky and creating harsh shadows, you may want to use a neutral density filter to reduce the amount of light entering the lens. This will allow you to use a wider aperture or slower shutter speed, which can create a shallow depth of field and blur the background, giving more focus to the camel.
- Graduated neutral density filter: If you’re shooting with the sun behind the camel, you may find that the sky is too bright and the camel is too dark. A graduated neutral density filter can help balance out the exposure by darkening the sky and keeping the camel’s exposure the same. This can create a more balanced and natural-looking photo.
- Color filters: Depending on the color of the light source you’re using, you may want to use a color filter to correct the white balance. For example, if you’re using a tungsten light source and your camera’s white balance setting is set to daylight, you may end up with a photo that has a yellow-orange cast. Using a blue color filter can help correct this and make the colors in the photo more accurate.
Keep in mind that while filters can be useful in enhancing your camel photography, they should be used sparingly and with intention. Experiment with different filters and techniques to see what works best for your style of photography.
Tips and Tricks to Enhance Your Camel Photography with Lighting
As with any form of photography, camel photography requires attention to detail and a certain level of expertise when it comes to lighting. By knowing how to use various lighting techniques, you can take your camel photography to the next level and capture stunning photos. In this section, we will explore some essential tips and tricks that will help you enhance your camel photography with lighting. These tips will help you make the most of your lighting setup and take your camel photography skills to new heights. So, let’s dive in and learn how to take the perfect camel photos!
Don’t forget to use shadows
When it comes to camel photography, using shadows creatively can add depth and drama to your photos. Here are some tips for using shadows effectively:
- Look for interesting shadow patterns: The desert sun can create intricate and beautiful shadow patterns on the sand. Look for interesting shapes and compositions to create captivating photos.
- Use shadows to highlight texture: Shadows can also be used to emphasize the texture of the camel’s fur or the sand beneath them. Play with the angle and direction of the light to create interesting patterns and textures in your photo.
- Think about the direction of the shadows: The direction of the shadows can greatly affect the mood of your photo. Shadows falling in a diagonal direction can create a sense of movement and drama, while shadows falling directly behind the subject can create a more serene and calm atmosphere.
- Integrate the shadows with the subject: Use the shadows to frame or enhance the subject. For example, a camel standing in a shaft of light with its elongated shadow stretching out beside it can create a striking and memorable image.
Remember that shadows can be just as important as the light itself when it comes to creating dynamic and visually interesting photos. So don’t be afraid to experiment and play around with different shadow patterns and compositions to create memorable camel photographs.
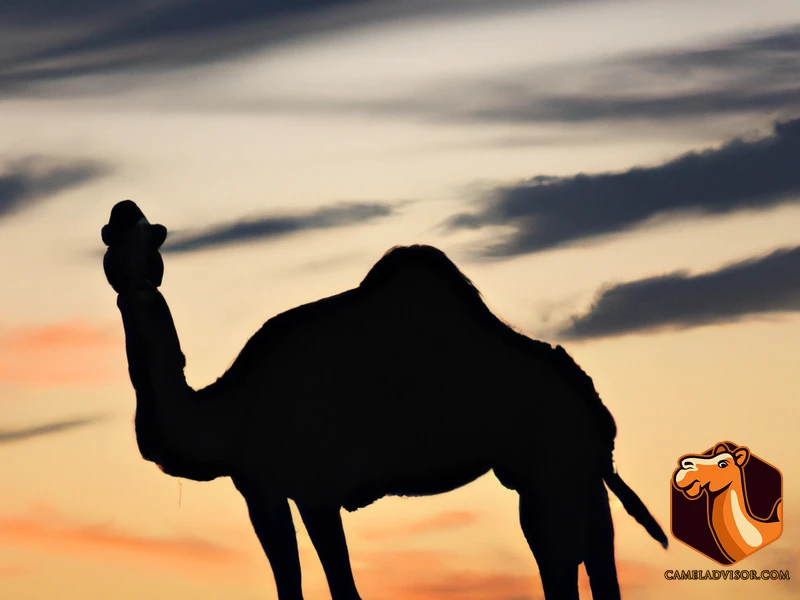
Experiment with backlighting
Experimenting with backlighting is another technique you can use to create stunning camel photographs. With this technique, you position the camel in front of the light source, so the light is coming from behind the subject. This creates a dramatic effect and draws attention to the silhouette of the camel.
Here are some tips to help you experiment with backlighting:
- Position the light source directly behind the camel, so the light is shining onto the back of the camel.
- Use a narrow aperture to create a shallow depth of field, so the silhouette of the camel is in focus.
- Adjust the exposure compensation to account for the bright backlight, so the subject isn’t underexposed.
- Look for interesting shapes and patterns in the silhouette of the camel, such as the humps or the outline of the legs.
- Shoot in RAW format, so you have more control over the final image when editing.
Experimenting with backlighting can add depth and dimension to your camel photos and create a unique and visually interesting image. However, it’s important to be mindful of the safety and wellbeing of the camel when positioning them in front of a bright light source. Make sure the animal is comfortable and not in any danger while you’re taking the photo.
Use a reflector to bounce light onto the camel
When taking photos of camels, it can sometimes be difficult to get the lighting just right. One useful technique for enhancing camel photography is to use a reflector to bounce light onto the subject. This technique allows you to control the direction and intensity of the light, resulting in a more dynamic and visually interesting photo.
What is a reflector?
A reflector is a surface that bounces light back onto the subject. Reflectors come in various shapes, sizes, and colors, but most are collapsible, making them easy to transport to a shoot location. They can be made from materials such as fabric, metal, or plastic.
How do I use a reflector?
To use a reflector, position it between the sun and the camel or place it in a shaded area to reflect light onto the camel. You can also hold the reflector above your head and angle it downwards to create a more dramatic effect. Experiment with different angles and distances to find the best lighting setup for your shoot.
What are the benefits of using a reflector?
Using a reflector has several benefits for camel photography:
- Controlled lighting: By bouncing light onto the camel, you have more control over the intensity and direction of the light. This allows you to create more depth and shadow, resulting in a more dynamic photo.
- Reduced harsh shadows: Reflectors can help reduce harsh shadows on the camel, which can result in a more even and flattering photo.
- Enhanced colors: Reflectors can also enhance the colors of the camel by reflecting light onto their fur. This can result in more vibrant and visually appealing photos.
- Professional-looking photos: Using a reflector can give your photos a more professional and polished look, as it helps to create a well-lit and visually interesting scene.
Using a reflector is a simple yet effective technique for enhancing camel photography. By bouncing light onto the subject, you can control the direction and intensity of the light, resulting in more dynamic and visually interesting photos. Experiment with different angles and distances to find the best lighting setup for your shoot.
Turn off the flash when natural light is available
Using flash in camel photography can be an effective way to add additional light and fill shadows. However, it can also create unflattering and unnatural results if not used correctly. It’s important to consider the available natural light when deciding whether to use flash or not. Turning off the flash when natural light is available can lead to more natural-looking photos with a better range of shadows and highlights.
Here are some factors to consider before using flash in camel photography:
| Factor | Consideration |
|---|---|
| Lighting | If you have access to natural light, evaluate its quality and direction. Natural light can give your photos a more authentic look and feel. It can also create beautiful shadows and highlights that add depth to your photos. |
| Setting | If you’re shooting in a setting where flash is not allowed, such as a museum or religious place, then you’ll need to rely on natural light. In this case, you’ll need to adjust your camera settings to compensate for low light conditions. |
| Desired look | If you’re going for a more dramatic or stylized look, then using flash might be appropriate. However, if you’re trying to capture the natural beauty of the camel, then natural light is usually the better option. |
Keep in mind that turning off the flash doesn’t mean you can’t control the lighting in your photos. You can still adjust the camera settings, use reflectors, or position the camel to take advantage of the natural light available. The goal is to achieve a balance between light and shadow that highlights the camel’s unique features and personality.
In conclusion, turning off the flash when natural light is available can lead to more natural-looking camel photos with a better range of shadows and highlights. It’s important to consider various factors, such as lighting, setting, and desired look, before using flash in your photos. With a little practice and creativity, you can use natural light to create stunning camel photos that capture the camel’s beauty and character.
Conclusion
As we conclude our discussion on using lighting to enhance camel photography, it is important to note that lighting plays a vital role in bringing out the best in your photographs. From understanding the sources of lighting to the direction and angle of the light, to color temperature and white balance, every detail matters in achieving beautiful and striking shots.
Before a shoot, scouting locations, checking the weather, and choosing the right time of day can make all the difference in creating optimal lighting conditions for your camel photography. During the shoot, using natural light, artificial light, or flash to balance light can bring out the best in your subject.
Post-processing is another crucial step in enhancing your camel photography. Color correction, sharpening, noise reduction and the use of filters can elevate your photos and give them a professional touch.
As photographers, we must always be open to experimenting with different lighting techniques, whether it be using shadows, backlighting, or a reflector to bounce light onto the camel. By doing so, we can add dimension and depth to our photos and create truly unique and captivating images.
In conclusion, mastering the art of lighting is key to taking exceptional camel photography. Taking the time to understand lighting and how it affects your subject can make all the difference in creating unforgettable photographs. So, keep these tips and tricks in mind and keep practicing to improve your skills and capture stunning camel shots every time.
Frequently Asked Questions
What type of lighting is best for camel photography?
The best type of lighting for camel photography is natural light, preferably during golden hour or blue hour.
Can I use artificial light for camel photography?
Yes, you can use artificial light such as a flash or strobe, but it requires some knowledge of how to balance the light.
How do I check the weather for a camel photography shoot?
You can check the weather on websites like Weather.com, or on your smartphone using a weather app.
What is the best time of day to photograph camels?
The best time of day to photograph camels is during golden hour or blue hour when the light is soft and warm.
What is color temperature and why is it important?
Color temperature is the measure of the color of light, ranging from warm to cool. It’s important because it affects the mood and tone of your photos.
Why is white balance important in camel photography?
White balance adjusts the colors in your photo to ensure they look accurate to the human eye. It’s important in camel photography to make sure the camel’s fur colors look true to life.
What is the best way to use shadows in camel photography?
Using shadows can add depth and dimension to your camel photos. Try positioning your camel at an angle to the light source to create strong, interesting shadows.
How can I experiment with backlighting in camel photography?
Backlighting can create stunning silhouettes and add a warm glow to your camel photos. Try shooting directly into the sun, or positioning the camel in front of a bright light source.
What is a reflector and how can it enhance camel photography?
A reflector is a tool used to bounce light onto your subject. It can enhance camel photography by filling in shadows and creating more even lighting.
Should I always turn off the flash in camel photography?
Not necessarily. If you’re shooting in low light or need to fill in shadows, using a flash can be helpful. However, in bright, natural light, turning off the flash can create a more natural-looking photo.