Contents
- Introduction
- Choosing the Right Camera and Lens
- Composition Techniques
- Working with Light
- Getting Close to Your Subject
- Editing Your Photos
- Telling a Story with Your Photos
- Conclusion
-
Frequently Asked Questions
- Can I take photos of camels from a distance?
- What is the best time of day for camel photography?
- Do I need to ask permission to photograph camels?
- Can I take photos of camels in the wild?
- What is negative space?
- Should I use a tripod for camel photography?
- Do I need to edit my camel photos?
- Can I take photos of baby camels?
- What is the rule of thirds?
- Can I take photos of camels at any time of year?
- References
Introduction
Camels are truly remarkable creatures that have captured the curiosity and imagination of people for centuries. Their beauty, resilience, and unique characteristics make them a fascinating subject for photography enthusiasts. However, capturing the best possible photos of camels can be a challenging endeavor, requiring careful consideration of various factors such as camera equipment, lighting, composition techniques, and more. In this article, we will take a detailed look at how to take the best photos of camels, step-by-step. From choosing the right camera and lens to working with light, getting close to your subject, editing your photos, and telling a story with your images, we will cover everything you need to know to create stunning camel photography. So, let’s dive in and discover the secrets of capturing the beauty and spirit of camels through the lens of your camera.
Talking about the beauty of camels
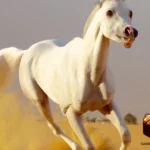
Camels are beautiful creatures that have been admired by photographers for many years. These majestic animals have a unique look that sets them apart from other creatures in the animal kingdom. Their long, slender legs, humped back, and prominent snout make them instantly recognizable. Camels are also known for their endurance and strength, allowing them to survive in some of the harshest environments on the planet.
Camels have been the subject of many famous photographs throughout history. From portraits to wildlife photography, camels have captured the hearts of photographers from all over the world. Some photographers have even found creative ways to incorporate camels into their travel photography, using them as a symbol of the culture and history of the Middle East.
Even though camels are primarily associated with the Middle East, they can be found in other parts of the world as well. Camels have gained a lot of popularity in wildlife photography as well, with many photographers capturing them in their natural habitat. From deserts to grasslands, camels can be seen wandering through some of the world’s most beautiful landscapes.
Through the lens of a camera, camels can become a symbol of many things. They can represent strength, beauty, endurance, and resilience. It’s no surprise that so many photographers have taken an interest in capturing these amazing animals in photographs.
If you’re interested in exploring the world of camel photography, there are many resources available to help you get started. From tips on using lighting to creating a narrative with your images, there’s something for every level of photographer. Check out some of the links below to learn more about the history and art of camel photography:
– /history-camels-photography/
– /camels-in-photography/
– /using-lighting-for-camel-photography/
Importance of taking good photos
Taking good photos of camels is important for a number of reasons. Camels are fascinating creatures that are steeped in history and culture, and they make for great photography subjects. But capturing the beauty, character, and distinctiveness of camels in photographs can be challenging. This is why taking good photos of camels requires skill, patience, and some knowledge of the animal.
Firstly, good photos of camels could serve as mementos of a trip or experience. For travel photographers, capturing the essence of a place often means documenting the people, landscape, and wildlife that make it unique. Camels have played a significant role in many cultures, and taking photos of them can help to convey the atmosphere and traditions of a region or country. In this way, camel photography can provide visual stories that capture the mood and character of a destination.
An excellent photo of a camel can make an impact and impression beyond its culture. Camels are often associated with deserts, adventure, and wilderness, and a high-quality photo that captures these elements can be powerful and inspiring. Wildlife photographers, in particular, are often drawn to capturing camels in their natural habitats, which can involve challenging lighting conditions, extreme temperatures, and unpredictable behavior. Good camel photos can showcase their captivating eyes, unique features, and patterns in their fur or skin.
Lastly, photographing camels well can help to establish and communicate a distinct photographic style or technique, which sets the photographer apart in their field. There are many famous photographers who have captured camels in their works, each with their own style and approach to the subject. For instance, Steve Mc Curry’s portraits of camels are always stunning and captivating, while Thomas L. Kelly is known for his aerial shots of camel caravans in the desert. By exploring different perspectives and approaches to camel photography, photographers can develop their own signature style.
Ultimately, taking good photos of camels requires an understanding of the animal’s personality, habits, and environment. Additionally, photographers must have the skills to select the appropriate camera and lens, composition, lighting, approachability, and editing techniques that help to capture these moments. By doing so, photographers can obtain remarkable shots that stand out and leave a lasting impact.
Choosing the Right Camera and Lens
When it comes to capturing stunning photos of camels, choosing the right camera and lens is paramount. The right equipment can make all the difference in achieving clear, captivating shots. Whether you’re interested in camels for portrait photography, wildlife photography, or travel photography, it’s crucial to understand what kind of camera and lens will work best for your specific needs. In the following sections, we will explore various factors to consider when selecting the right camera and lens for camel photography. If you’re interested in learning more about the different perspectives in camel photography, check out our article on exploring camel photography perspectives.
Selecting the camera for your need
When it comes to photographing camels, selecting the right camera is crucial to capturing stunning images. There are many different types of cameras available, including DSLR, mirrorless, and point-and-shoot. DSLR (digital single-lens reflex) cameras are a popular choice among professional photographers for their image quality and versatility. They also allow for interchangeable lenses, which is important for capturing different types of shots.
Mirrorless cameras are another option that offer high-quality images in a smaller, lighter body. They also have the advantage of being quieter than DSLRs, making them a great option for photographing animals that may be easily spooked by loud noises.
For those who want something smaller and more portable, point-and-shoot cameras are a good choice. While they may not offer the same level of control and image quality as DSLR or mirrorless cameras, they can still produce great images with a little bit of know-how.
Ultimately, choosing the right camera depends on your individual needs and preferences. Consider factors such as image quality, portability, and features like Wi-Fi connectivity or weather-sealing before making your decision. To learn more about how famous photographers capture camels, check out our article on famous photographers capturing camels.
Choosing the best lens for camel photography
When it comes to capturing the best photos of camels, choosing the right lens is crucial. Here are some tips for selecting the best lens for camel photography:
- Zoom Lens: A versatile zoom lens is a great option for capturing a range of photos of camels. This type of lens allows you to adjust the focal length and zoom in or out depending on your subject and surroundings. Additionally, a zoom lens allows you to get close-up shots of camels without having to physically move too close to them, which can help keep you and the camel safe.
- Telephoto Lens: If you want to capture camels in their natural habitat or from a distance, a telephoto lens is the best option. This type of lens has a long focal length, which allows you to capture subjects from afar while still maintaining image quality.
- Wide-Angle Lens: For camel photography during your travels, a wide-angle lens can be useful in capturing the surrounding landscapes and environment. This type of lens is great for creating a sense of depth and immersing the viewer in the scene.
- Macro Lens: If you want to capture the intricate details of a camel, a macro lens can help you achieve this. This type of lens has a very narrow depth of field, allowing you to focus on specific details of your subject.
Keep in mind that the lens you choose will also depend on your camera body and personal preferences. Take some time to research and experiment with different lenses to find the best fit for your camel photography.
Composition Techniques
When it comes to photographing camels, capturing the right composition is crucial. A well-composed photo can transform an ordinary image into a captivating one that mesmerizes the viewer. Successful composition in camel photography requires an understanding of the rule of thirds, the importance of negative space, and the ability to capture movement. By implementing these techniques, you can create stunning images that showcase the beauty of these magnificent animals. Later in this article, we will explore these composition techniques in more detail, so stay tuned.
Using the rule of thirds
Using the rule of thirds is a popular photography technique that can help create more dynamic and interesting compositions. Rather than centering the subject in the frame, the rule of thirds divides the frame into a 3×3 grid, with the subject placed along one of the lines or at one of the intersections of those lines. This creates a more visually pleasing image that draws the viewer’s eye towards the subject.
To apply the rule of thirds, simply imagine a grid on your camera’s viewfinder or LCD screen. Many cameras even have the option to turn on a grid overlay for easier composition. When photographing camels, you can place them along one of the grid lines, with their head or body at one of the intersections. This can add balance and interest to your photo.
It’s important to note that the rule of thirds is not a hard and fast rule – sometimes centering the subject can create a powerful image. However, it’s a good starting point and can help you experiment with different compositions.
Additionally, the rule of thirds can be used in combination with other techniques, such as negative space or capturing movement. For example, you can place the camel along one of the grid lines and leave a lot of empty space in the opposite area of the frame to create an interesting composition with negative space. Or, if the camel is walking or running, you can capture its movement by placing it along one of the lines and leaving space in front of it for it to “move” into the frame.
For more tips on portrait photography of camels, check out our article on camels portrait photography. Or, for inspiration from the Middle East, take a look at our camel photography in Middle East.
Importance of negative space
Negative space, also known as “empty space,” plays a crucial role in photography. It refers to the area around your subject that has no significant visual elements. This blank space might seem unimportant, but its presence can greatly enhance the impact of your photo.
Why is negative space important?
Negative space provides a sense of balance and simplicity to your photographs. It isolates your subject, drawing the viewer’s attention to it and making it stand out. This approach is particularly effective when you want to portray the majesty of a camel, as it helps to emphasize the animal’s size and grace in comparison to its empty surroundings.
Negative space can be used to create a feeling of tranquility or solitude. By leaving a lot of open space in your photo, you can produce a calming effect that helps the viewer focus on the subject and appreciate its beauty.
How can you use negative space?
There are various ways that you can use negative space in your camel photos. One approach is to position your subject so that it fills only a portion of the frame, allowing the rest to be empty space. You can also place the subject off-center, using the rule of thirds to create a strong visual composition.
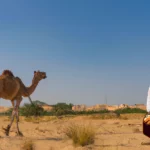
Another method is to capture the landscape around the camel and let it fade into negative space. This will add depth to the photo and help to convey the vastness of the desert environment in which camels often reside.
Regardless of your approach, keep in mind that negative space should have a purpose in your photograph. Don’t include it simply for the sake of having something in the background. Instead, use it intentionally to enhance your image and draw attention to your subject.
| Importance of negative space in camel photography |
|---|
| Benefits of using negative space: |
| 1. Provides balance and simplicity to the photograph |
| 2. Helps to isolate the subject and make it stand out |
| 3. Creates a calming effect and showcases the subject’s beauty |
| Ways to use negative space in camel photography: |
| 1. Position the subject off-center using the rule of thirds |
| 2. Capture the landscape to provide depth and convey the environment |
| Remember: |
| 1. Negative space should have a purpose in the photograph |
| 2. Use it intentionally to enhance your image and draw attention to your subject |
Capturing movement
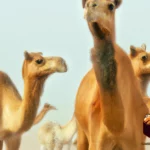
One of the most important aspects of taking great photos of camels is to capture their movement, which can add a dynamic element to your photos and bring them to life. Movement can come in many forms when it comes to camels, whether it’s the sway of their bodies as they walk, the playfulness of their young ones, or the fierce determination of a racing camel.
To capture movement effectively, there are several techniques that you can use.
One technique is to use a slow shutter speed in order to create motion blur. This can be especially effective when photographing racing camels or camels walking in groups. To achieve this effect, you will need to use a tripod to keep your camera steady while your shutter is open for a longer period of time.
Another technique is to freeze the action by using a fast shutter speed, which is ideal when photographing a specific moment or gesture, such as a camel kicking up sand or reaching for food. This technique requires careful timing and a good understanding of your camera’s settings in order to get the timing just right.
Additionally, you can pan your camera along with the camel, which will keep the camel in focus while blurring the background to create a sense of motion. To do this effectively, you will need to choose a slower shutter speed and move your camera in the same direction as the camel’s movement.
Finally, you can experiment with angles to create a sense of motion in your photos. For example, you can shoot from a low angle to make a camel appear larger and more dominant, or from a high angle to make it appear smaller and more vulnerable.
Capturing movement in your camel photos requires experimentation and practice. By using these techniques and thinking creatively about your approach, you can create stunning images that bring these magnificent creatures to life.
| Techniques for Capturing Movement in Camel Photography |
| Use a slow shutter speed to create motion blur |
| Use a fast shutter speed to freeze the action |
| Pan your camera along with the camel’s movement |
| Experiment with angles |
Working with Light
One of the most important factors in any kind of photography is light. It can make or break a shot, and camel photography is no exception. The way light falls on a camel’s fur or how it casts a shadow can add depth and texture to the image, making it more interesting and engaging for the viewer. However, different lighting conditions can present their own unique challenges. As a photographer, it’s important to know how to work with light to capture the essence and beauty of the camels. Let’s explore some tips and tricks for working with light in camel photography.
Best time of day for camel photography
When it comes to camel photography, choosing the right time of day can make a huge difference in the lighting and overall quality of your photos. Here are some tips to help you capture the perfect shot:
- Early Morning: If you want to capture soft, warm light and avoid harsh shadows, shooting during the early morning hours is ideal. The light at this time is also great for bringing out rich colors and creating a peaceful, serene mood.
- Midday: While shooting during midday isn’t typically recommended due to the harsh, directional light, it can be great for dramatic shots. The high-contrast lighting can add texture and depth to your images and create interesting shadows.
- Afternoon: The late afternoon hours, just before sunset, are known as the golden hour in photography. The light during this time is soft and warm, casting a beautiful glow on your subject. This is a great time to capture silhouettes or create a dreamy atmosphere.
- Sunset: As the sun sets, the light becomes even warmer and more colorful, creating a stunning backdrop for your photos. This is also a great time to play with silhouettes and experiment with creative angles.
Remember, different times of day can present different challenges and opportunities, so it’s important to be prepared and flexible. If you’re shooting during midday, for example, make sure to manage the harsh light by using a reflector or diffuser. With the right technique and tools, you can capture stunning photos of camels any time of day.
Using golden hour to your advantage
During the golden hour, the light is softer and warmer, making it the ideal time for camel photography. The golden hour occurs twice a day, during the first hour after sunrise and the last hour before sunset. During this time, light appears golden, casting a warm glow on the scene.
Benefits of using golden hour for camel photography
Choosing to take photos of camels during the golden hour can have several benefits. Firstly, the light is softer, which means that it is more forgiving and can make the camels look more attractive. Secondly, the warm glow of the light adds a natural, warm tone to the photos, enhancing their overall beauty. This is especially useful when shooting in desert environments where the orange tones of the light can complement the camel’s coat of fur.
Preparing for golden hour
To utilize the golden hour to its fullest extent, it’s important to be prepared in advance. Check the local sunset and sunrise time to ensure you don’t miss the golden hour. Being early will give you time to compose great shots and experiment with different angles. It’s also worth checking the weather forecast to ensure the golden hour will be visible, as cloud cover can impact the quality of the light.
Techniques for shooting during golden hour
To capture stunning camel photos during the golden hour, here are some techniques to keep in mind:
Shoot in manual mode: Shooting in manual mode allows you to control the exposure and adjust it to the changing light conditions.
Experiment with angles: During the golden hour, the light is softer and shadows are longer, creating opportunities to experiment with different angles to capture unique and creative pictures.
Focus on details: The soft golden glow during this hour can create stunning photos of the fur and features of the camel. Get up close and personal to capture the details with a macro lens or focus on camel’s eyes to add emotional depth.
| Benefits of using golden hour for camel photography | Preparing for golden hour | Techniques for shooting during golden hour |
|---|---|---|
| • Soft and warm light | • Check local sunrise and sunset times • Check weather forecast |
• Manual mode • Experiment with angles • Focus on details |
| • More forgiving light | • Arrive early to plan compositions and experiment • Be ready with equipment and settings |
• Use reflections from the golden light • Experiment with long exposures |
| • Enhances natural beauty | • Scout locations beforehand | • Use light to add depth and dimension • Utilize backlighting to create silhouettes |
Managing harsh light
When taking photos of camels, managing harsh light can be a challenge. Below are some tips to help you navigate this issue:
| Tip | Description |
| Pick the right time of day | Shooting during the golden hours (early morning or late afternoon) can help to soften harsh light, providing a warmer and more subdued feel to your photos. |
| Use a diffuser or reflector | Using a diffuser or reflector can help to soften harsh shadows and create a more even light across your subject. |
| Adjust your camera settings | Adjusting your camera’s aperture, shutter speed and ISO can also help to manage harsh light. Using a small aperture and fast shutter speed can help to reduce overexposure and harsh shadows. However, increasing the ISO can also help to brighten up darker areas, so it is important to experiment with these settings to find the balance that works best for you. |
| Look for shade | If it is possible, try to shoot in shaded areas or create some artificial shade. This can help to reduce the contrast between light and shadow, making it easier to expose the image correctly. |
By incorporating these techniques when managing harsh light, you can create more visually appealing camel photographs. Remember to experiment with different settings and methods to find what works best for you and your subject.
Getting Close to Your Subject

As a photographer, there’s nothing quite like capturing the intricate details and personalities of your subject up close. When it comes to photographing camels, getting close can be a bit of a challenge.
These majestic animals may seem intimidating at first, but with the right techniques, it’s possible to get up close and personal with them to capture stunning shots that highlight their unique features. In this section, we’ll explore some tips and tricks for safety approaching camels and using a zoom lens to capture those amazing details. So, buckle up and get ready to learn how to get the best shots of these breathtaking creatures.
How to approach camels safely
Approaching camels safely is crucial for both the photographer’s safety as well as the camels’. Here are some tips to keep in mind:
- Approach slowly: As with any wild animal, you should approach camels slowly and cautiously. Quick movements can startle them and cause them to become aggressive.
- Respect their space: Camels need their own space and you should avoid getting too close to them. Keep in mind that camels can kick and bite, so it’s best to give them a wide berth.
- Observe their behavior: Take the time to observe the behavior of the camels you’re photographing. Are they agitated or calm? Are they eating or resting? Understanding their behavior can help you predict their next moves and take better photos.
- Avoid using flash: Flash photography can startle and frighten camels, causing them to become upset or agitated. Using natural light will not only help you capture better photos but it will also keep the camels more at ease.
- Be patient: One of the most important things to remember when approaching camels is to be patient. Allow them to become comfortable with your presence before attempting to take any pictures. This will help to ensure both your safety and the safety of the camels.
Using a zoom lens to capture details
When it comes to capturing the intricate details of camels, using a zoom lens can be incredibly beneficial. With the ability to zoom in and out, a zoom lens allows the photographer to adjust their focal length and capture various details of the subject. Here are some reasons why zoom lenses are advantageous in camel photography:
| Flexibility | Zoom lenses have a wide range of focal lengths, which allow the photographer to shoot close-up and faraway shots of the camels without having to move around a lot. It’s particularly useful when shooting large groups of camels or trying to get a shot of a specific camel without causing any disturbance. |
| Detail | Camels are unique creatures with intricate designs and features. Using a zoom lens, photographers can capture these details with precision, highlighting the texture of their skin, their fur, and the interesting patterns that decorate their bodies. |
| Isolation | Camel photography can be challenging when you’re dealing with multiple subjects in one frame. With a zoom lens, you can easily blur out the background and isolate a specific camel or group of camels, drawing the viewer’s attention to the main subject. |
| Compression | One of the benefits of zoom lenses is that they compress the background, making it appear closer to the subject. This effect can create fantastic images and produce an artistic blur, enhancing the visual appeal of your photos. |
Using a zoom lens in camel photography is a great way to capture stunning details and showcase the beauty of these magnificent creatures. By considering the flexibility, detail, isolation, and compression effects of these lenses, photographers can take their camel photography to the next level.
Editing Your Photos
As much as we would like to take the perfect photo right off the camera, we can sometimes end up with shots that do not live up to our expectations. This is where post-processing comes in handy. Taking the time and effort to edit your photos can greatly improve the quality and impact of your camel images. In this section, we will explore some useful tips and techniques for editing your photos to make them stand out.
Using the right software
When it comes to editing your camel photos, it’s crucial to use the right software to achieve your desired look. There are numerous software options available, each with their own strengths and weaknesses. Here are some considerations for choosing the right software:
- Features: Look for software that has the features you need, such as basic editing tools like cropping, adjusting exposure and contrast, and color correction.
- Compatibility: Make sure the software is compatible with the file format of your photos. Some software may not support certain file types.
- User interface: The software should have a user-friendly interface to make editing your photos as easy as possible.
- Cost: Editing software can range from free to several hundred dollars. Determine the features you need and your budget before selecting a software.
- Community and support: Look for software with a strong community following and active support in case you encounter any issues.
Once you’ve chosen your software, it’s important to learn the basics of how to use it. Some basic editing techniques include adjusting exposure and contrast, adjusting color saturation and hue, and sharpening the image. However, it’s important to know when to stop editing and avoid over-processing your photos. Take the time to experiment with different editing techniques and find the ones that work best for your style and vision.
Basic editing techniques
When it comes to editing your camel photos, there are a few basic techniques that can really make a difference. Here are some of the key techniques to keep in mind:
| Cropping | Cropping allows you to cut out any distracting elements in your photo and focus on the main subject. Experiment with different crop ratios to see what works best for your photo. |
| Color Correction | Adjusting the color balance and saturation is a simple way to make your photos look more balanced and vibrant. Be careful not to overdo it, as this can make your photo look unnatural. |
| Contrast Adjustment | Increasing the contrast can add more depth to your photo and make the colors pop. Be careful not to make the contrast too extreme, as this can result in loss of detail. |
| Sharpening | Sharpening can help bring out some of the fine details in your photo. However, be careful not to overdo it, as this can result in a grainy or blurry image. |
| Noise Reduction | Reducing noise can clean up your image and make it look more polished. However, be careful not to remove too much noise, as this can result in a loss of details and sharpness. |
Remember, the key to good editing is to enhance the natural beauty of your photo, rather than making it look overly stylized or artificial. Take the time to experiment with these basic techniques and find the right balance of editing for each photo.
Knowing when to stop
Editing your photos is an important step in the process of creating the best possible images of camels. However, as they say, “less is more.” It’s crucial to know when to stop editing and avoid overprocessing your photos. Here are some tips to help you know when it’s time to stop:
- Don’t go overboard with filters: Using filters can add a unique look to your photos, but it’s essential to use them sparingly. Overusing filters can make your photos look artificial and take away from the beauty of the subject.
- Avoid over-sharpening: While it may be tempting to make your photo as sharp as possible, too much sharpening can create unnatural edges and ruin the overall look of the image.
- Keep the colors natural: Manipulating the colors of your image too much can ruin the authenticity of the photo, making it appear fake and unnatural. Keep the colors as true to life as possible.
- Don’t lose focus on the subject: It’s important to remember that the purpose of the photo is to capture the beauty of the camel, not to showcase your editing skills. Ensure that the camel remains the focal point of the image.
- Take a break: Sometimes looking at a photo for too long can lead to over-editing. Take a break and come back to the photo with fresh eyes to avoid making unnecessary adjustment.
Remember, the goal is to enhance the natural beauty of the camel, not to create a completely new image. By keeping editing to a minimum and knowing when to stop, you can ensure that your photos will be stunning and authentic representations of these magnificent creatures.
Telling a Story with Your Photos
When it comes to photography, it’s not just about capturing a beautiful image – it’s about telling a story. And when it comes to photographing camels, there are so many stories to tell. From their majestic beauty to their rugged resilience, camels are fascinating creatures that make for compelling subjects. So, how can you use your photos to tell a story? Let’s explore some tips and techniques for creating a narrative with your camel photography.
Choosing a theme or concept
When it comes to capturing the best photos of camels, choosing a theme or concept can add an extra layer of interest to your images. Here are some tips for selecting a theme or concept for your camel photography, and how to execute it:
- Consider the location: The setting where you are photographing the camels can inspire a theme or concept. For example, if you are in the desert, you may want to capture the camels in their natural habitat, showcasing their ability to survive in harsh conditions.
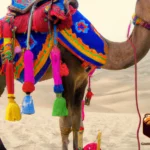
- Showcase their purpose: Camels have been used for transportation and cargo carrying for centuries. Highlight their purpose by capturing them with loaded saddles, or walking along a caravan.
- Explore their personalities: Like humans, camels have distinct personalities. Some are friendly and curious, while others are more reserved or feisty. Use your camera to capture their unique personalities through their facial expressions and body language.
- Highlight their beauty: Camels are often associated with their unique appearance, including their humps and long eyelashes. Focus on their physical characteristics by capturing close-up shots of their faces or detailed shots of their textures.
- Contrast their size: Camels are known for their large size, so try adding a contrasting element to your photos to highlight their scale. This could include including a person or object of a smaller size than the camels to create a sense of proportion.
- Show interactions with humans: Camels have a long history of interacting with humans, so consider capturing their relationship with their handlers or riders. This can add a human element to your photos and tell a story about the connection between people and these animals.
By choosing a theme or concept for your camel photography, you can add depth and meaning to your images and create a more engaging experience for your viewers.
Capturing emotion and personality
When taking photos of camels, it is important to capture not only their physical features but also their personality and emotion. To do this, there are a few techniques you can use:
- Observe their behavior: Spend some time observing the camels before taking photos. See how they interact with each other and their environment. This will give you a better understanding of their personality and help you capture their unique traits in your photos.
- Focus on their eyes: The eyes are the window to the soul, as they say. When taking photos of camels or any animal, focusing on their eyes can bring out their emotion and personality.
- Shoot candid moments: Sometimes, the best way to capture a camel’s personality is to capture it in its natural state. Look for candid moments where the camel is not aware of your presence and just being itself.
- Get down to their level: Shooting from the same height as the camel can help you capture its personality more effectively. It also adds a unique perspective to your photos.
- Include context: Including the camel’s environment in the photo can also help tell a story and capture its personality. For example, a photo of a camel in the desert will have a different feel than a photo of a camel in a zoo.
- Avoid unnatural poses: Finally, avoid forcing the camel into unnatural poses or situations. This will not only stress the animal but also result in photos that do not capture its true personality.
By using these techniques, you can capture photos that not only showcase the physical beauty of camels but also their unique personalities and emotions.
Creating a narrative with your images
A great photograph not only captures a moment in time, but it can also tell a story. To create a narrative with your images, consider the following techniques:
| Technique | Description |
|---|---|
| Use composition to imply action | Compose your shot in a way that suggests motion or activity. For example, you could frame a group of camels in such a way that it looks like they are walking into the distance. |
| Include people or objects for scale | Camels can be massive animals, so including people or objects in your shot can help give a sense of scale. For example, you could take a photo of a camel standing next to a person to show just how big the animal really is. |
| Focus on relationships | Camels are social animals, and they often have close relationships with their handlers. Try to capture these relationships in your photos, such as a camel looking affectionately at their handler or a group of camels grooming each other. |
| Include context | Your photos can tell a story not just about the camels, but also about the environment in which they live. Including details about the landscape or local culture can help to create a richer image that tells a more complete story. |
By using these techniques and creatively composing your shots, you can capture images that not only showcase the beauty of camels but also tell a compelling story.
Conclusion
As our journey of learning how to take the best photos of camels comes to an end, it’s time to reflect on the many valuable lessons we’ve covered. Throughout this article, we’ve highlighted the importance of choosing the right camera and lens, utilizing composition techniques, working with light, getting close to your subject, editing your photos, and telling a story with your images. By implementing these strategies, you can elevate your camel photography to new heights and capture the unique beauty and personality of these magnificent creatures. Let’s take a closer look at the key takeaways from this comprehensive guide.
Summing up the article
To sum up, taking the best photos of camels requires careful consideration of various factors including camera and lens choice, composition techniques, working with light, getting close to your subject, editing your photos, and telling a story with your images. It’s essential to select the right camera and lens for your needs, with a zoom lens being a useful tool for capturing details and getting up close to your subject safely.
Composition Techniques such as using the rule of thirds, negative space, and capturing movement can help create visually interesting and dynamic photographs. Understanding how to work with light, including the best time of day for camel photography and managing harsh light, can help you achieve stunning results.
When it comes to editing, using the right software and basic editing techniques are crucial. However, it’s important to know when to stop and not over-edit your photo. Ultimately, the goal should be to tell a story with your images by selecting a theme or concept, capturing emotion and personality, and creating a narrative.
Remember, camels are unique and fascinating subjects, and by following these tips, you can take striking and memorable photos that showcase their beauty and personality.
Frequently Asked Questions
Can I take photos of camels from a distance?
Yes, it is recommended to maintain a safe distance from camels while taking photos.
What is the best time of day for camel photography?
Early morning or late afternoon is recommended as the bright sun can create harsh lighting during the middle of the day.
Do I need to ask permission to photograph camels?
It is always a good idea to ask the owner or caretaker of the camels before taking their photos, especially if you plan on using them for commercial purposes.
Can I take photos of camels in the wild?
Yes, you can take photos of wild camels, but it is important to research the behavior of the species and take necessary precautions to ensure your safety.
What is negative space?
Negative space is the area around the subject in a photo that is intentionally left empty to create a sense of balance and emphasis.
Should I use a tripod for camel photography?
Using a tripod can help to stabilize your camera and ensure sharp photos, especially when using a longer lens or taking photos in low light.
Do I need to edit my camel photos?
Editing your photos can enhance their quality and make them more visually appealing, but it is not a requirement.
Can I take photos of baby camels?
Yes, but it is important to approach them cautiously and avoid disturbing their natural environment.
What is the rule of thirds?
The rule of thirds is a technique in photography where the image is divided into thirds horizontally and vertically, with the subject placed at one of the intersecting points.
Can I take photos of camels at any time of year?
Yes, but depending on the climate and environment, certain times of year may be more conducive for camel photography, such as during festivals or migrations.