Contents
- Introduction
- Preparing for Dyeing
- Natural Dyeing Methods
- Synthetic Dyeing Methods
- Post-dyeing Process
- Expert Tips and Techniques
- Conclusion
-
Frequently Asked Questions
- What is the best way to clean camel wool before dyeing?
- Why is mordanting important when dyeing camel wool?
- What are some common plant-based dyes used for camel wool?
- What are some common insect-based dyes used for camel wool?
- What is the difference between acid, basic, and direct dyes?
- Can I mix different types of dyes when dyeing camel wool?
- How do I rinse and finish camel wool after dyeing?
- How can I experiment with colors when dyeing camel wool?
- What should I consider when choosing a dye for camel wool?
- How should I store camel wool after dyeing?
- References
Introduction

Embarking on a new craft project can be exciting, but also daunting. When it comes to dyeing camel wool, it can be especially overwhelming if you don’t know where to start. That’s where we come in – with our step-by-step guide, you’ll feel confident and prepared to take on this unique task. Camel wool, prized for its warmth and durability, is the perfect material for cozy blankets and stylish clothing. But before you can start creating, you’ll need to know the ins and outs of dyeing camel wool. So, let’s dive into the world of dyeing methods and explore the possibilities!
What is Camel Wool?
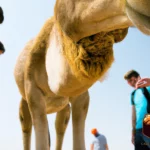
Camel wool is a luxurious natural fiber that comes from the fleece of camels. It is prized for its warmth, durability, and softness. The high-quality camel wool is obtained from Bactrian and dromedary species of camels. A mature camel can produce between 5 to 30 pounds of wool annually, which is enough to make a garment or two, depending on the size.
Characteristics of Camel Wool
Here are the key characteristics of camel wool:
| Characteristics | Details |
|---|---|
| Fiber Diameter | Between 18-40 microns |
| Color | Natural shades range from white, beige, light brown to dark brown |
| Texture | Soft, supple and crimped |
| Warming properties | Warmer than sheep’s wool due to its insulating properties and fiber diameter |
| Moisture resistance | Can absorb up to 30% of its weight in moisture without feeling damp |
| Durability | Resistant to tearing and abrasion |
If you want to learn more about the benefits of camel wool, check out our article on Understanding Camel Wool Benefits.
Why Dye Camel Wool?
Dyeing Camel Wool: Adding Colors to an Already Luxurious Textile
| Reason | Description |
| Enhancing Aesthetics | Camel wool may have a naturally beautiful color, but dyeing it in various hues can make it look more appealing and suitable for different fashion and interior design applications. It provides additional options for designers and consumers to work with. |
| Customization | By dyeing camel wool, you can create custom color combinations to suit particular preferences. This is beneficial for fashion designers and interior decorators who want to showcase their unique styles. |
| Revitalization | Camel wool products that have lost their luster can be revived with a fresh coat of dye. This is particularly helpful for old or vintage items that may have become dull or faded over time. |
| Improved Durability | Some dyes can strengthen and improve the durability of camel wool, making it more resistant to wear and tear, as well as to moisture and sunlight. |
The practice of dyeing camel wool has a long-standing tradition that spans cultures and centuries. In certain societies, it is considered a symbol of status and prestige. Today, camel wool is still an innovative textile with endless possibilities for experimentation and creativity.
For a deeper understanding of this luxurious material, check out our article on the history and cultural significance of camel wool. You may also be interested in learning about the innovative uses of camel wool in the realms of fashion and interior design, or the process of shearing and sorting camel wool fibers.
Preparing for Dyeing
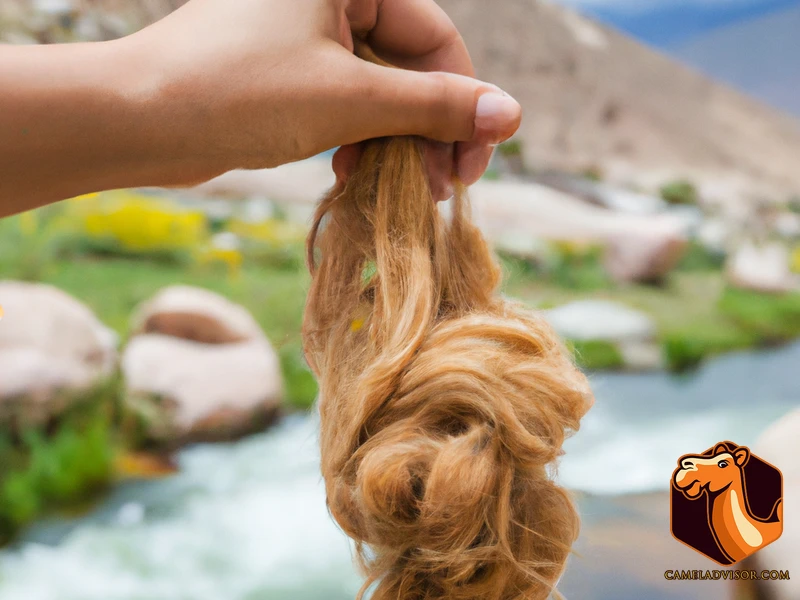
Preparing the camel wool for dyeing is just as important as applying the dye itself. It is a crucial step that ensures the color is absorbed evenly, and the end product is of good quality. Before we delve into the actual dyeing methods, we need to first understand the necessary steps to be taken in preparing the camel wool for dyeing. This includes cleaning to remove any unwanted materials and mordanting to prepare the fibers to accept the dye. If you want to learn more about the journey of camel hair from animal to wool, check out our previous article: The Journey of Camel Hair: From Animal to Luxurious Wool.
Cleaning Camel Wool
Before beginning the dyeing process for camel wool, it’s important to clean the wool to remove any dirt, oils, and other impurities. Proper cleaning will ensure that the dye penetrates the fibers evenly for beautiful and consistent color. Here are the steps involved in cleaning camel wool:
| Step | Description |
|---|---|
| 1. | Fill a large basin or sink with lukewarm water. |
| 2. | Add a mild detergent or wool wash to the water. |
| 3. | Gently submerge the camel wool into the water and agitate it slightly to loosen any dirt or debris. |
| 4. | Let the wool soak in the soapy water for about 10 minutes. |
| 5. | Drain the soapy water and rinse the wool thoroughly with clean water until all the soap is removed. |
| 6. | Optional: Repeat steps 2-5 if the wool is still dirty or greasy. |
| 7. | Gently press or squeeze out excess water, but do not wring or twist the wool, as this can damage the fibers. |
| 8. | Spread the wool out on a towel and roll it up to absorb more moisture. |
| 9. | Lay the wool flat to air dry in a well-ventilated area, away from direct sunlight and heat sources. |
It is recommended to clean the wool immediately after collecting it from the camel. For more information on collecting and cleaning camel wool, you can refer to our article on Camel wool collecting and cleaning.
Mordanting Camel Wool
Before dyeing camel wool, it is necessary to undergo the process of mordanting to increase the colorfastness and durability of the dye. A mordant is a substance that is added to the fiber before dyeing to help the dye molecules bond to the fiber, resulting in a deeper and longer-lasting color.
Types of Mordants
There are several types of mordants that can be used on camel wool, including alum, iron, and copper. These mordants can be used individually or in combination with each other to achieve different results.
Alum: Alum is a popular mordant that is safe and easy to use. It enhances bright colors and is particularly suitable for plant-based dyes. Alum is available in powder or crystal form and can be dissolved in water or a mixture of water and citric acid.
Iron: Iron mordant produces darker shades and is often used with plant-based dyes. When using iron, it is important to be careful not to use too much, as it can cause the colors to become dull and gray.
Copper: Copper mordant is commonly used with animal-based dyes and produces shades of green and blue. It can also be used with plant-based dyes to produce brighter colors.
| Mordant | Pros | Cons |
|---|---|---|
| Alum | Safe and easy to use Enhances bright colors |
May weaken fibers over time if used excessively Can cause colors to become dull if used with certain dyes |
| Iron | Produces darker shades Commonly used with plant-based dyes |
Can cause colors to become dull and gray if used excessively May damage the fibers over time |
| Copper | Produces shades of green and blue Can be used with animal-based dyes |
Can be toxic if not used properly May damage the fibers over time if used excessively |
Mordanting Process
To mordant camel wool, follow these steps:
1. Weigh the wool you want to dye and calculate the amount of mordant needed (typically 10-20% of the weight of the fiber).
2. Dissolve the mordant in hot water.
3. Fill a large pot with enough water to cover the wool and heat it to approximately 180°F (82°C).
4. Add the dissolved mordant to the pot and stir well.
5. Add the wool to the pot and stir gently to ensure that it is evenly coated with the mordant solution.
6. Simmer the wool in the mordant solution for 1-2 hours.
7. Remove the pot from the heat and let it cool overnight.
8. The next day, remove the wool from the pot and rinse it well with cool water to remove any excess mordant.
Now your camel wool is ready for dyeing.
Natural Dyeing Methods
One of the oldest and most sustainable ways of dyeing camel wool is through the use of natural dyes. These dyes are made from various plant and insect-based sources, and are known for their environmentally friendly nature. Natural dyes also yield a unique range of colours that can add depth and richness to your camel wool. Let’s take a closer look at the steps involved in using natural dyes for your camel wool.
Using Plant-based Dyes
Plant-based dyes are a popular and eco-friendly option for dyeing camel wool. These dyes come from natural sources such as roots, leaves, flowers, and bark of trees. Here is a step-by-step guide for using plant-based dyes:
- Choose the right plant: Firstly, choose the plant based on the color you want to achieve. For example, onion skins create a warm orange, while indigo plants provide a blue hue.
- Extract the dye: Once you have chosen the plant, extract the dye by boiling it in water. The amount of water and plant material required depends on the weight of the wool and the desired color intensity.
- Prepare the wool: To prepare the wool for dyeing, wash it in lukewarm water and use a detergent if necessary. Then, soak the wool in water to ensure it is thoroughly wet.
- Dye the wool: Place the wool in the dye bath and heat it slowly to a simmer. Leave the wool to soak in the dye bath until the desired color is achieved, stirring occasionally. This can take anywhere from 30 minutes to a few hours.
- Rinse and finish: Once the wool has reached the desired color, remove it from the dye bath and rinse it in lukewarm water until the water runs clear. Then, add a small amount of vinegar to a final rinse to help set the color. Lay the wool flat to dry.
It’s important to note that different plants produce different results, so it’s important to do research before selecting a plant-based dye. Additionally, the final color result may vary depending on the mordant used and the pH level of the dye bath.
Using Insect-based Dyes
Insect-based dyes are derived from the shells of certain insects, such as the cochineal beetle. These dyes produce rich, vibrant reds and pinks, making them a popular choice for dyeing camel wool. Here’s how to use insect-based dyes to dye camel wool:
Step 1: Prepare the dye bath by adding the cochineal beetles to a pot of boiling water. The amount of beetles you use will depend on the amount of wool you plan to dye and the desired intensity of the color.
Step 2: Simmer the beetles for at least an hour until the water turns a deep, rich red color.
Step 3: Strain the dye bath to remove the cochineal beetles and any solids.
Step 4: Add the camel wool to the dye bath and simmer for an hour or until the desired color is achieved.
Step 5: Remove the wool from the dye bath and rinse thoroughly with cool water.
Step 6: Wash the wool with a gentle wool wash to remove any excess dye and to soften the fibers.
Note that insect-based dyes can be quite potent, so be sure to wear gloves and a mask when handling them. Also, keep in mind that the final color of the wool will depend on several factors, including the type of wool, the pH level of the water, and the amount of dye used. Experimenting with the dye bath and keeping detailed notes can help you achieve your desired results.
Synthetic Dyeing Methods
As we dive into the world of dyeing camel wool, we come to the section of synthetic dyeing methods. In contrast to natural dyes, synthetic dyes are chemically processed, offering greater color fastness and more color variety. There are different types of synthetic dyes available on the market, each with different properties and requirements for application. In the following sections, we will delve deeper into the basics of synthetic dyeing, highlighting the different types of acid, basic, and direct dyes, their pros and cons, and the significance of pH levels in the dyeing process.
Using Acid Dyes
Acid dyes are widely used for dyeing camel wool due to their ability to produce vibrant and long-lasting colors. Here is a step-by-step guide for dyeing camel wool using acid dyes.
- Prepare the dye bath: Measure out the appropriate amount of dye and mix it with hot water to dissolve it.
- Prepare the wool: Soak the camel wool in warm water for at least 30 minutes.
- Mix the dye: Add the dissolved dye to the dye bath, along with any additional chemicals such as an acid or a leveling agent.
- Heat the dye bath: Place the dye bath on a stove top and bring it to a simmer.
- Add the wool: Gently place the pre-soaked wool into the dye bath and stir it occasionally for even dyeing.
- Monitor the dyeing process: Keep the dye bath at a consistent temperature and stir the wool occasionally. Check the color saturation regularly until the desired hue is achieved.
- Rinse the wool: Remove the wool from the dye bath and rinse it thoroughly with warm water until the water runs clear.
- Wash the wool: Wash the wool with a gentle soap, such as wool wash, to remove any remaining dye and to condition the fibers.
- Dry the wool: Squeeze any excess water out of the wool and lay it flat on a clean towel to air dry. Avoid exposing the wool to direct heat or sunlight.
It is important to note that different acid dyes require different preparation and dyeing techniques. Always follow the specific instructions provided with your dye to ensure the best results. Additionally, acid dyes can be toxic, so be sure to wear gloves and work in a well-ventilated area while handling them.
Using Basic Dyes
Basic dyes are commonly used to dye camel wool because they are highly effective and can produce bold, vivid colors. Basic dyes are also relatively simple to use, making them ideal for beginners or those who are new to dyeing.
The process for using basic dyes to dye camel wool is as follows:
| Step | Description |
|---|---|
| Step 1 | Prepare the dye bath by dissolving the basic dye powder in hot water. |
| Step 2 | Add the premordanted camel wool to the dye bath, ensuring that it is completely submerged. |
| Step 3 | Heat the dye bath to a simmer and stir the wool gently for approximately 30 minutes. |
| Step 4 | Allow the wool to cool in the dye bath for a minimum of 1 hour or overnight for best results. |
| Step 5 | Remove the wool from the dye bath, squeezing out any excess dye. |
| Step 6 | Rinse the wool with cool water until the water runs clear. |
| Step 7 | Wash the wool with a mild detergent to remove any remaining dye residue and rinse thoroughly with cool water. |
Some tips for using basic dyes effectively include:
– Use a large enough dye pot to allow the wool to move around freely.
– Use hot water to dissolve the dye powder and to ensure that the wool absorbs the dye evenly.
– Add vinegar or citric acid to the dye bath to adjust the pH level and help the wool absorb the dye more effectively.
– Experiment with different dye concentrations to achieve the desired color intensity.
– Always follow safety precautions when working with dyes, including wearing gloves and a mask to avoid inhaling dye particles.
– Keep in mind that basic dyes can be toxic if ingested, so store them out of reach of pets and children.
Using Direct Dyes
Direct dyes are a type of synthetic dye that can be used to dye camel wool. These dyes are known for their ease of use and can be applied directly to the wool without the need for a mordant. Here are the steps involved in using direct dyes to dye camel wool:
- Prepare the Dye Bath: Begin by preparing the dye bath according to the instructions provided by the manufacturer. This typically involves dissolving the direct dye in hot water and adding any additional chemicals that may be necessary.
- Soak the Wool: Next, soak the camel wool in hot water to prepare it for dyeing. Make sure that the wool is completely submerged and allow it to soak for at least 30 minutes.
- Add the Dye: Once the wool has soaked, remove it from the water and squeeze out any excess moisture. Add the wool to the dye bath and stir gently to ensure that it is evenly coated.
- Heat the Dye Bath: Heat the dye bath to the temperature recommended by the manufacturer and maintain this temperature for the duration of the dyeing process. This will typically be around 60-80°C.
- Monitor the Dye Bath: Keep an eye on the dye bath and stir the wool occasionally to ensure that the color is being evenly distributed. Depending on the desired depth of color, the wool may need to soak in the dye bath for several hours.
- Rinse and Finish: Once the wool has reached the desired color, remove it from the dye bath and rinse it thoroughly in warm water. You may also want to add a small amount of vinegar to the rinse water to help set the color.
Direct dyes can offer a wide range of bright and vibrant colors, making them a great choice if you are looking to make a bold statement with your camel wool. However, be sure to follow the manufacturer’s instructions carefully and take appropriate safety precautions when working with synthetic dyes.
Post-dyeing Process
Once you have completed the dyeing process, it is important to carefully handle the camel wool to ensure the color lasts and the fibers remain intact. The post-dyeing process involves several crucial steps, including rinsing and finishing and drying and storing. Following these steps will help you achieve the best results and preserve the quality of your dyed camel wool.
Rinsing and Finishing
After dyeing the camel wool, it is important to properly rinse and finish the fibers to ensure that the color sets and the wool is ready for use. Here are some steps to follow for rinsing and finishing:
Rinsing:
| Step 1: | Fill a basin with lukewarm water and add a small amount of gentle soap or wool wash. |
| Step 2: | Submerge the dyed wool in the water and gently agitate it for a few minutes. |
| Step 3: | Drain the water and refill the basin with fresh water. |
| Step 4: | Repeat this process until the water runs clear and there is no more dye coming out of the wool. |
| Step 5: | Press out as much water as possible without twisting or wringing the wool. |
Finishing:
| Step 1: | Lay the wool flat on a clean towel and roll it up to remove excess water. |
| Step 2: | Unroll the towel and reshape the wool if necessary. |
| Step 3: | Allow the wool to air dry completely, away from direct sunlight and heat sources. |
| Step 4: | Once the wool is completely dry, brush it gently with a soft-bristled brush to fluff up the fibers. |
| Step 5: | Store the wool in a cool, dry place until ready for use. |
It is important to follow these steps carefully to ensure that your dyed camel wool looks its best and lasts as long as possible. With proper rinsing and finishing, you can enjoy your beautiful, custom-colored camel wool for a variety of crafting projects.
Drying and Storing
After rinsing the dyed camel wool thoroughly, it’s time to dry and store it properly to maintain the vibrancy and longevity of the dye. Here are some tips for drying and storing camel wool after dyeing:
| Step | Description |
|---|---|
| 1. | Remove excess water: Gently squeeze the wool to remove excess water. Do not twist or wring it, as this could damage the fibers and cause the dye to fade. |
| 2. | Hang to dry: Hang the wool in a cool, dry place away from direct sunlight. Avoid using high heat or direct sunlight to dry the wool, as this can cause the fibers to become brittle and break. |
| 3. | Fluff and reshape: Once the wool is dry, fluff it up with your hands to restore its natural shape and texture. Do not use a brush or comb, as this can damage the fibers. |
| 4. | Store properly: Store the dried wool in a cool, dry place where it won’t be exposed to moisture or insects. Avoid storing it in plastic, as this can trap moisture and cause mold to grow. |
Properly drying and storing your dyed camel wool is essential to preserving its beauty and integrity. Take care when handling and storing the wool to ensure it remains in top condition for years to come.
Expert Tips and Techniques
Now that you know the basics of dyeing camel wool, it’s time to take your skills to the next level with some expert tips and techniques. These helpful insights will guide you on how to choose the right dye and experiment with colors to achieve the perfect shade. By incorporating these tips, you can enhance the results of your dyeing project and create beautiful, unique pieces out of camel wool. So, let’s get started!
Choosing the Right Dye
When it comes to choosing the right dye for camel wool, several factors should be considered. Here are some key points to keep in mind:
Dye Type: Camel wool can be dyed using either natural or synthetic dyes. Natural dyes are derived from plant or insect sources and can produce a range of earthy tones. Synthetic dyes, on the other hand, offer a wider range of colors and are generally easier to use.
Fiber Content: It is important to consider the fiber content of the camel wool when choosing a dye. Some dyes are specific to certain types of fibers, and using the wrong dye can result in poor color retention or uneven dyeing.
Colorfastness: Another important consideration is the colorfastness of the dye. Some dyes may fade or bleed over time, while others are more resistant to fading and washing.
Environmental Impact: Finally, it is important to consider the environmental impact of the dye. Natural dyes are often considered more environmentally friendly than synthetic dyes, as they are derived from renewable resources and typically have low toxicity levels.
After considering these factors, you can choose the right dye for your camel wool based on your desired color, fiber content, and environmental impact. Remember to always follow the manufacturer’s instructions for best results.
Experimenting with Colors
When it comes to dyeing camel wool, experimenting with different colors can be a fun and creative process. There are various factors that can affect the outcome of your colors, such as the type of dye used, the mordanting process, and the fiber’s natural color. Here are some tips for experimenting with colors:
1. Start with natural dyes: Plant-based and insect-based dyes are a great way to experiment with colors, as they can produce a range of beautiful earthy tones. Using natural dyes can also be a more sustainable and eco-friendly option.
2. Mix and match: Don’t be afraid to mix different dyes together to create unique color combinations. For example, mixing madder root with weld can produce a range of shades from yellow to red to orange.
3. Try different mordants: Different mordants can produce different shades of colors. For example, using alum mordant can produce bright, clear colors while using iron mordant can produce deeper, darker colors.
4. Experiment with dye concentrations: Altering the concentration of the dye can affect the intensity and shade of color produced. Try using higher concentrations of dye for more vibrant colors, or lower concentrations for softer, more muted tones.
5. Use different dyeing techniques: There are various dyeing techniques that can produce different effects on the wool, such as tie-dye, dip-dye, or ombre. Experimenting with these techniques can add an extra layer of creativity to your dyeing process.
Here is a table summarizing some of these color experimentation tips:
| Tip | Description |
|---|---|
| 1. Start with natural dyes | Use plant-based and insect-based dyes for a range of earthy tones. |
| 2. Mix and match | Combine different dyes together for unique color combinations. |
| 3. Try different mordants | Experiment with different mordants to produce different shade of colors. |
| 4. Experiment with dye concentrations | Alter the concentration of dye to control the intensity and shade of color. |
| 5. Use different dyeing techniques | Try different dyeing techniques for different effects on the wool. |
Remember to have fun with your dyeing process and don’t be afraid to try new things. With these color experimentation tips, you can create beautiful, unique colors on your camel wool.
Conclusion
After going through the different dyeing methods for camel wool, it is evident that there are various ways to achieve unique and beautiful colors. Ultimately, the method chosen will depend on personal preference and the availability of materials.
Natural dyeing methods are a sustainable and eco-friendly option, as plant-based and insect-based dyes are readily available and do not harm the environment. However, the color range may be limited, and the dyeing process can be time-consuming.
On the other hand, synthetic dyeing methods offer a wider range of colors and are typically easier to use. However, they can be harmful to the environment if not disposed of properly, and some people may have allergic reactions to the dyes.
Regardless of the method chosen, proper preparation and post-dyeing care are crucial for achieving long-lasting and vibrant colors. Choosing the right dye and experimenting with different color combinations can also lead to exciting and unique results.
In conclusion, dyeing camel wool can be a rewarding and enjoyable experience, and the possibilities for creativity are endless. With patience and attention to detail, anyone can create beautiful and unique pieces of woolen garments or accessories.
Frequently Asked Questions
What is the best way to clean camel wool before dyeing?
The best way to clean camel wool before dyeing is to gently hand wash it in cool water with a mild soap.
Why is mordanting important when dyeing camel wool?
Mordanting is important because it helps the dye adhere to the camel wool fibers, resulting in a more vibrant and long-lasting color.
What are some common plant-based dyes used for camel wool?
Common plant-based dyes used for camel wool include indigo, madder root, and weld.
What are some common insect-based dyes used for camel wool?
Common insect-based dyes used for camel wool include cochineal and lac.
What is the difference between acid, basic, and direct dyes?
Acid dyes are used on protein fibers such as wool and are applied in an acidic solution. Basic dyes are used on synthetic fibers and are applied in a basic solution. Direct dyes can be used on a variety of fibers and do not require a mordant.
Can I mix different types of dyes when dyeing camel wool?
It is not recommended to mix different types of dyes when dyeing camel wool as they may react with each other and result in unpredictable colors.
How do I rinse and finish camel wool after dyeing?
Rinse camel wool thoroughly in cool water until the water runs clear. Then, gently squeeze out any excess water and hang the wool to dry. Once dry, you can lightly steam or iron the wool to finish.
How can I experiment with colors when dyeing camel wool?
You can experiment with colors by using different dye concentrations, combining multiple colors, or even creating a gradient or ombre effect.
What should I consider when choosing a dye for camel wool?
When choosing a dye for camel wool, consider the type of fiber, the desired color, and any environmental or health concerns associated with the dye.
How should I store camel wool after dyeing?
After dyeing, store camel wool in a cool, dry place away from direct sunlight to prevent fading or discoloration.