Contents
- Introduction
- Tip 1: Plan Your Shot Ahead of Time
- Tip 2: Utilize the Golden Hours of Photography
- Tip 3: Experiment with Angles and Perspectives
- Tip 4: Focus on the Camels’ Expressions and Movements
- Tip 5: Pay Attention to Lighting and Shadows
- Tip 6: Incorporate the Landscape into Your Shot
- Tip 7: Use a Fast Shutter Speed to Capture Action Shots
- Tip 8: Don’t Forget About the Details
- Tip 9: Experiment with Filters and Editing Techniques
- Tip 10: Practice, Practice, Practice
- Conclusion
- Frequently Asked Questions
- References
Introduction
When it comes to photography, capturing the perfect shot can be a thrilling experience. And if you’re a fan of adventure and travel, then taking amazing photos of camel riding is definitely something worth trying. However, like with any kind of photography, mastering the art of camel riding photos requires some preparation and skill. In this article, we will explore 10 tips that will help you capture stunning camel riding photos step-by-step. From planning your shot to experimenting with filters and editing techniques, we’ve got you covered. So, grab your camera and get ready for an exciting journey through the world of camel riding photography!
Why Camel Riding Photos are So Popular
Camel riding photos have gained immense popularity over the years, and for good reason. These photos have become increasingly popular as a form of travel photography and adventure photography in recent years. Some of the reasons why these photos are so popular are:
- The exoticism: Camels are often associated with desert regions in Africa, the Middle East, and Asia, which are regarded as very exotic destinations for travel. When people see these photos, they often feel like they are getting a glimpse of a world that is vastly different from their own.
- The adventure: Riding a camel is not an everyday occurrence for most people, so seeing photos of people doing so can be very thrilling. The idea of setting off on a desert adventure with these majestic animals can be very romantic and exciting.
- The culture: Camel riding is often associated with traditional Bedouin culture, and seeing these photos can provide a glimpse into this unique way of life that is foreign to many people.
- The landscape: Camels are often photographed against stunning scenic backdrops, such as vast deserts, imposing mountains, and sparkling oceans. This makes for breathtaking shots that are sure to leave an impression on viewers.
Camel riding photos have become a popular means of capturing travel memories and showcasing the beauty of exotic destinations. Whether you are an experienced photographer or just starting, learning how to capture great camel riding photos can be a valuable skill for any traveler. If you’re interested in taking your own camel riding photos and want to learn more, check out our article on 10 Tips for Capturing Amazing Camel Riding Photos.
Preparation for Your Camel Riding Photo Shoot
Preparation for Your Camel Riding Photo Shoot
Before you head out on your camel riding photo shoot, there are a few important things to consider. Planning ahead and preparing for your shoot can help ensure that you capture the best possible images. Here are some tips to help you prepare:
| Tip | Description |
| 1 | Research the area where you will be riding camels, and learn about the culture and history of camel riding. This will give you a better appreciation for the experience and help you capture more meaningful photos. |
| 2 | Dress appropriately for the climate and terrain. Wear comfortable, breathable clothing and sturdy shoes, and bring sun protection such as a hat and sunscreen. |
| 3 | Check your camera equipment and make sure it is in good working order. Bring extra batteries and memory cards, and consider investing in a protective case to keep your gear safe during the ride. |
| 4 | Discuss your photo goals with your guide, and ask for their advice on the best spots and angles for taking photos. They might also be able to offer tips on how to interact with the camels and get the most out of your ride. |
| 5 | Practice your camel riding skills before you go on your photo shoot. This will not only help you feel more comfortable during the ride, but it will also give you more opportunities to capture great photos. |
By taking these steps before your camel riding photo shoot, you can help ensure that you are prepared to capture amazing photos that you will treasure for years to come. For more information on camel riding tours and tips, check out our camel riding tours page.
Tip 1: Plan Your Shot Ahead of Time
One of the key elements of capturing amazing camel riding photos is planning your shot ahead of time. This means thinking about what kind of image you want to create, and how you will achieve it. Will you focus on the camels themselves, or will you incorporate the landscape into the shot? Will you be shooting action shots or more still, posed photos?
It’s important to consider these things before you start taking photos, as it will help you to focus your attention and ensure that you get the shots you want. You don’t want to come back from your camel ride and realize that you missed out on some great photo opportunities.
When planning your shots, it’s also important to take into account things like the weather and the time of day. If you’re going to be riding camels in the desert at noon, you’ll likely be dealing with harsh sunlight and intense heat. This might not be the best time to take photos, as the lighting will be less flattering and you might not be feeling your best. On the other hand, if you plan your ride for early morning or late afternoon, you’ll likely have softer, more diffused light to work with, which is generally more flattering and creates more interesting shadows.
Taking the time to plan your shots ahead of time will also help you to anticipate any challenges you might face during the shoot. For example, if you’re riding camels in a crowded tourist area, you’ll need to think about how you can get clear shots without too many people in the background. Or if you’re working with untrained camels, you’ll need to be prepared for any unexpected movements or behaviors.
Ultimately, planning ahead will help you to stay focused during your camel ride and get the shots you want. By taking the time to consider your goals and your environment, you’ll be better equipped to create images that are both stunning and meaningful.
Anchor: If you’re interested in learning more about the history of camel riding or famous camel rides around the world, check out our related articles.
Tip 2: Utilize the Golden Hours of Photography
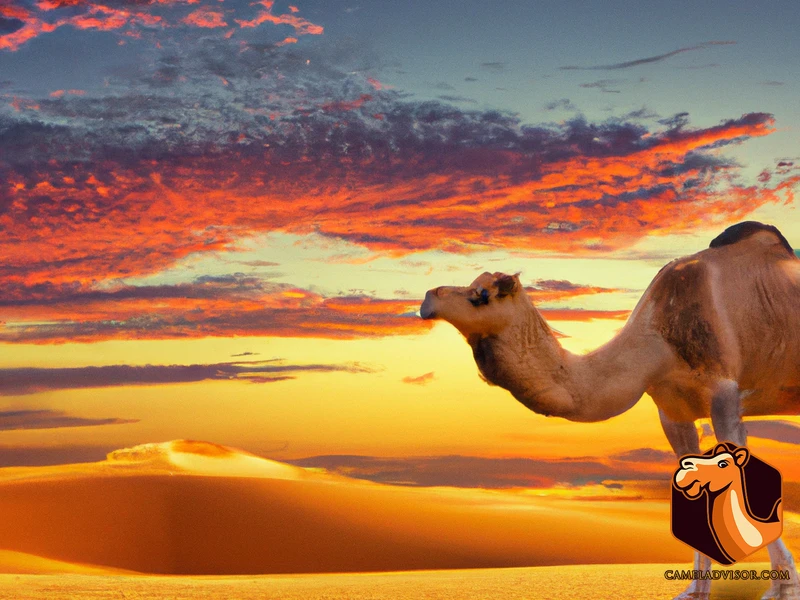
When it comes to capturing amazing camel riding photos, one of the most important tips to keep in mind is to utilize the golden hours of photography. The golden hours refer to the first hour after sunrise and the last hour before sunset, when the sun is low in the sky and the lighting is soft and warm. This type of lighting can add a beautiful golden glow to your photos and make them look more captivating.
During the golden hours, the light is also much more forgiving, which means that you won’t have to worry about harsh shadows or blown-out highlights. This makes it much easier to capture the details and textures of the camels’ fur and the landscapes around them. Additionally, the softer lighting can help to bring out the colors in your photos and create a more dreamy, romantic atmosphere.
To make the most of the golden hours, it’s important to plan your shoot ahead of time and be ready to go when the moment arrives. This may mean waking up early or staying out late, but it will be worth it to capture those stunning shots. If you’re on a camel riding tour, make sure to plan your route and timing accordingly so that you can be in the right place at the right time.
It’s also a good idea to experiment with different camera settings during the golden hours, such as adjusting your aperture, shutter speed, and ISO to get the perfect exposure. You can also try shooting in manual mode to have more control over your photos.
Utilizing the golden hours of photography is a great way to capture amazing camel riding photos that are full of warmth, color, and texture. So, don’t be afraid to wake up early or stay out late and make the most of this magical time of day.
Pro tip: If you want to learn more about the history of camel riding or get some tips for packing for a camel riding tour, check out our other articles on bedouin camel riding history and camel riding tour packing tips.
Tip 3: Experiment with Angles and Perspectives
When it comes to taking camel riding photos, experimenting with angles and perspectives can take your photography skills to the next level. Don’t just take photos from the same standing position that everyone else takes. Instead, try different angles to add variation to your collection.
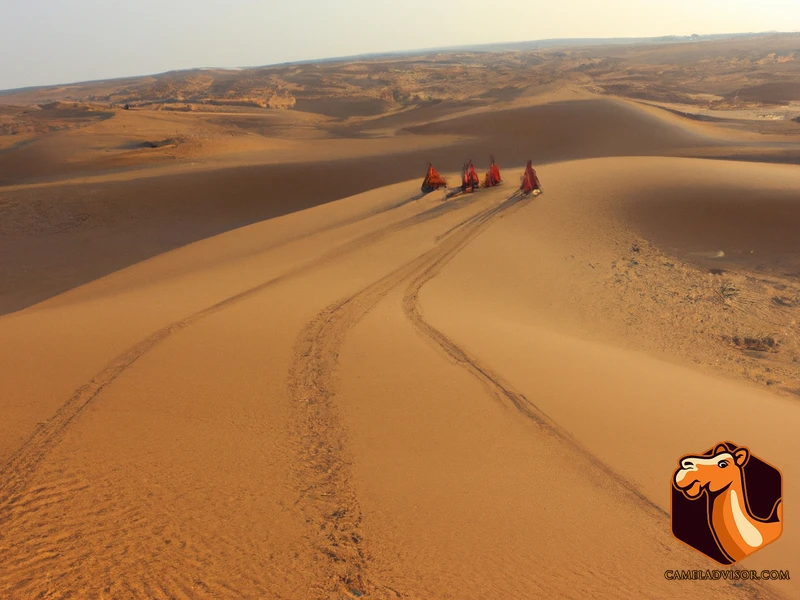
Get Elevated: Try to take photos from elevated positions to get a unique perspective. You can climb a hill or take a drone shot if you have access to one. This angle can be especially useful when you want to incorporate the stunning desert landscape in the background.
Get Low: On the other hand, getting low to the ground can allow you to showcase interesting details that you might otherwise miss. Experiment with taking photos while kneeling or even lying down to get a new perspective. You can capture the intricate details of a camel’s feet or interesting patterns in the sand.
Capture Action: Another great way to experiment with angles is to capture the movement of the camels. Get close to the ground and capture the dust that a camel’s hooves are kicking up, or take a shot from behind as you capture the camels’ tails swishing back and forth. This technique is especially effective when using a slow shutter speed.
Include People: Don’t forget to include the riders in your photos. Experiment with taking photos from different angles and framing the shot in various ways. You can try a close-up of the rider’s face or capture the entire group from one side. This technique can add depth and emotions to your photos.
Remember, there are no right or wrong ways to experiment with angles and perspectives. Just take your time, try different approaches, and see what works best for you. You might discover a unique angle that turns an average shot into an extraordinary one.
If you want to learn more about camel riding, including famous camel rides around the world, the benefits of camel riding to health, and even camel ride etiquette, check out these helpful resources:
Famous Camel Rides
Benefits of Camel Riding to Health
Camel Rides and Ecosystems
Camel Ride Etiquette
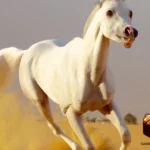
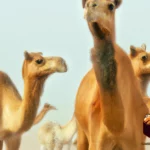
Tip 4: Focus on the Camels’ Expressions and Movements
When capturing camel riding photos, one important tip to keep in mind is to focus on the camels’ expressions and movements. Camels are fascinating animals with unique features and behaviors that can really add depth and interest to your photos. To do this, use your camera’s autofocus feature or manually adjust the focus to ensure that the camel’s features and movements are in sharp detail.
Expressions are a great way to bring emotion and personality into your photos. Focus on the camel’s eyes and mouth, as they can convey a range of emotions, from curiosity to frustration. Try to capture the perfect moment when the camel’s expression tells a story, such as when it’s interacting with its rider or when it’s gazing out at the landscape.
Movements are another way to add interest to your camel riding photos. These animals have very distinctive movements that you can capture in motion or by freezing them in time. You can snap a photo of the camel mid-step, which can create a dynamic and engaging image. Or, if you’re looking for something more serene, you can focus on the camel’s graceful, swaying gait as it moves across the desert.
Incorporating both expressions and movements can create a more dynamic story within your photo, so don’t be afraid to take a lot of shots and experiment with angles and perspectives. Remember, camels are unpredictable – they may snort, shake their heads, or suddenly become still – so be ready to capture the moment as it unfolds.
Focusing on the camels’ expressions and movements can add depth and interest to your camel riding photos. Always be ready to snap a photo when the perfect moment presents itself and use your camera’s focus features to ensure details are in sharp detail. Experiment with angles and perspectives to capture the perfect shot.
Tip 5: Pay Attention to Lighting and Shadows
When it comes to capturing amazing camel riding photos, paying attention to lighting and shadows is essential. The right lighting can make all the difference and can create a truly stunning image. It’s important to be aware of the direction and quality of the light, as well as the shadows it is casting.
Direction of Light: The direction of the light is crucial when it comes to capturing great photos while camel riding. The best light is often found during the golden hours, which fall at sunrise and sunset. During these times, the light is softer and more diffused, creating a warm and glowing effect on the desert landscape. Make sure to position yourself so that the light is coming from the side, as this will create interesting shadows and highlights on the camels and riders.
Quality of Light: The quality of the light refers to how intense or soft the light is. Harsh midday sun can create harsh, unflattering shadows and bright highlights that can wash out the details in the photo. On the other hand, diffused light from a cloudy day can create a soft, natural look that is easy on the eyes. Depending on the look you’re going for, adjusting your camera settings can help you capture the quality of light accurately.
Casting Shadows: Shadows can be just as important as the light itself. They can add depth and dimension to the photo and create a sense of drama. Be mindful of the placement of the sun and how it’s casting shadows on the subjects. Shadows can help to define the shapes of the camels and their riders and create interesting patterns on the ground.
Understanding how lighting and shadows work together is essential to capturing amazing camel riding photos. With the right direction and quality of light, as well as shadow placement, you can create truly stunning and memorable images. Don’t be afraid to experiment and play with these elements and see what kind of unique photos you can create.
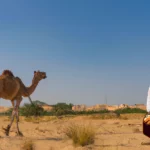
Tip 6: Incorporate the Landscape into Your Shot

When it comes to capturing amazing camel riding photos, incorporating the landscape into your shots can make all the difference. The vast desert landscapes and sand dunes can create a stunning backdrop for your subject. But it’s important to keep in mind that the landscape should not overpower the camels or the riders.
One way to incorporate the landscape is to use leading lines. The lines created by the sand dunes or mountains can draw the viewer’s eye towards the camels and create a sense of depth in the photo. You can also try to capture the contrast between the light and dark areas in the landscape. For example, the shadows created by the dunes can add a dramatic element to your photo.
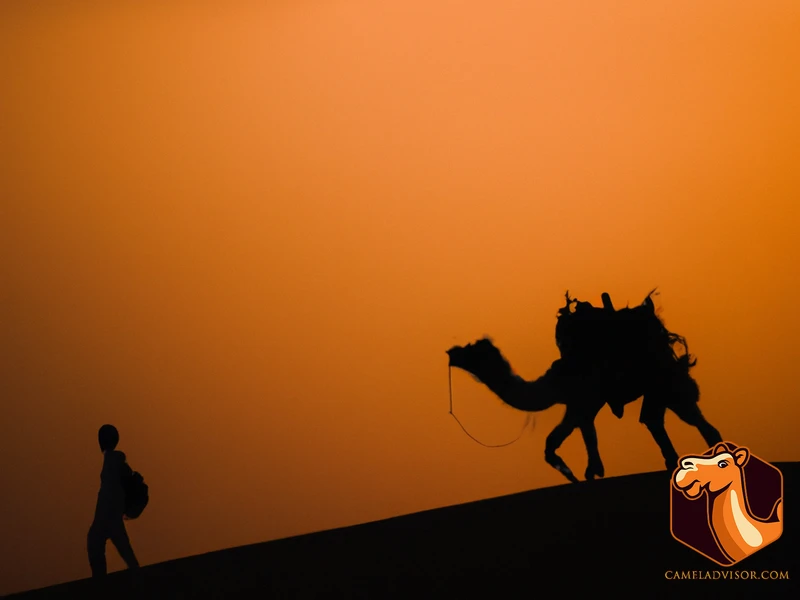
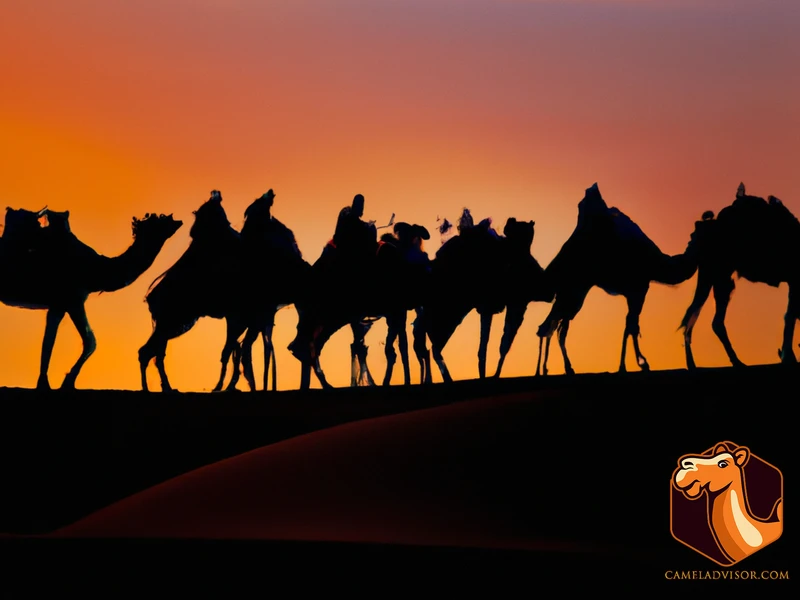
Another technique to incorporate the landscape is to use the camels and riders as a silhouettes against the sunset or sunrise. This can create a stunning and memorable shot that captures the beauty of the desert landscape as well as the camels.
When incorporating the landscape, it’s important to pay attention to the overall composition of the photo. Make sure the camels and riders are not too small in the frame, and that they stand out from the background. You can use foreground elements such as rocks or vegetation to create a sense of scale and add depth to the photo.
Incorporating the landscape into your camel riding photos can create stunning and eye-catching shots. Experiment with different techniques and keep in mind the composition of the photo to create a captivating and memorable image.
Tip 7: Use a Fast Shutter Speed to Capture Action Shots
Capturing action shots while camel riding can be particularly challenging, but using a fast shutter speed can help freeze the movement and result in stunning photos. When camels are in motion, particularly when they are galloping or trotting, they can be difficult to photograph due to their speed, unpredictability, and relatively small size. A fast shutter speed will help you capture sharp and clear images of the camels in motion.
To ensure you have the right shutter speed, it is important to understand your camera’s capabilities and adjust them accordingly. Most DSLRs and mirrorless cameras have a shutter speed setting that can be adjusted manually. A shutter speed of 1/1000th of a second or faster is recommended for capturing the movement of the camels. This will require shooting in bright lighting conditions, such as during the golden hours of photography or in sunny weather.
When the shutter speed is set high, it is essential to use a lower aperture or higher ISO settings to maintain the correct exposure. Keep in mind that a high shutter speed and low aperture can result in a shallower depth of field, which may not be desirable for certain shots.
Experiment with different shutter speeds to find the right balance between capturing the movement of the camels and maintaining image clarity. Try different angles and perspectives, such as approaching the camels from the front or shooting from a low angle to show the movement and power of the animals.
Using a fast shutter speed can also help capture other elements in the photo, such as dust or sand kicked up by the camels’ hooves. These additional details can add depth and interest to your photos, making them stand out from the rest.
Remember, practice makes perfect when it comes to capturing action shots. Don’t be discouraged if your first few attempts don’t turn out as desired. Keep experimenting with different settings and techniques, and soon you’ll be able to capture amazing camel riding photos with ease.
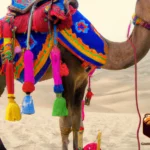
Tip 8: Don’t Forget About the Details

When it comes to capturing amazing camel riding photos, it’s easy to get caught up in getting the perfect shot of the camels themselves. However, it’s important not to forget about the details that can make your photos stand out.
One of the most important details to pay attention to is the riders. Whether they are the ones leading the camels or just along for the ride, the riders can add a sense of scale and context to your photos. Be sure to capture their expressions and movements as well, as this can add emotion and narrative to your shots.
Another important detail is the camel gear. From the intricate designs of the saddles to the colorful blankets and tassels, the gear can add visual interest and cultural context to your photos. Be sure to zoom in and capture the details of the gear as well.
The location and setting of your camel riding photos can also add important details to your shots. Is there a colorful bazaar in the background? Or perhaps a stunning mountain range? Capturing the surrounding landscape can add depth and context to your photos.
Finally, don’t forget about the smaller details such as the camel’s feet, the sand or dust being kicked up by the camels, or the way the light hits the camel’s fur. These details may seem insignificant, but they can add texture and visual interest to your photos.
Paying attention to the details can elevate your camel riding photos from ordinary to extraordinary. Capturing the riders, camel gear, location, and smaller details can add emotion, cultural context, and visual interest to your shots. So, don’t forget to zoom in and capture the details next time you’re out taking camel riding photos.
Tip 9: Experiment with Filters and Editing Techniques
One way to elevate your camel riding photos is to experiment with different filters and editing techniques. In the world of photography, post-processing is a crucial step in enhancing the images you capture. There are a variety of filters and editing tools available that can add creative touches and enhance the overall quality of your photos.
Filters: Filters are a great way to add visual interest to your photos. They can add depth, contrast, and color to your images. Some popular filters include Polarizing filters, which can enhance the blue hues of the sky and reduce glare, and Graduated Neutral Density filters, which can balance the exposure between the sky and the land to create a more evenly lit photo.
Color Correction: Another editing technique is color correction. This can help you adjust the colors in your photo to make them more vibrant or muted depending on your preference. You can use tools like saturation, contrast, and hue adjustments to fine-tune the color balance.
Cropping and Framing: Cropping and framing your photo is another way to bring your vision to life. By cropping your images, you can focus on specific focal points or eliminate unwanted elements. You can also experiment with different framing techniques such as adding a border or blending in elements of the landscape.
Black and White: Lastly, consider experimenting with black and white filters. This can be a creative way to add contrast and depth to your images. Sometimes removing the color can add a new perspective to your photo, highlighting shadows and textures that may not have been as prominent in the original color image.
Experimenting with filters and editing techniques can add a creative touch to your camel riding photos. Whether you’re adjusting the color balance, adding contrast or experimenting with black and white, there are a variety of post-processing tools available to help you create the perfect photo. Don’t be afraid to experiment and find your own unique style.
Tip 10: Practice, Practice, Practice
Photography, like any other skill, requires practice to master. The more you practice, the better your photos will be. Tip 10 is the most important of all – practice, practice, practice.
Try different techniques. Experiment with different angles, exposures, lighting, and camera settings. See how they affect your photos and how you can use them to enhance your camel riding photos. Take the time to familiarize yourself with your camera and its features. Learn how to adjust the settings to get the best results in different conditions.
Get familiar with the location. Familiarize yourself with the location where you plan to take camel riding photos. Take note of the best spots for photos, the lighting conditions, and the angles that work well. Look for interesting backgrounds and take advantage of them in your photos.
Practice shooting in different conditions. Practice taking photos in different weather conditions – sunny days, cloudy days, and even rain. Each type of weather presents unique opportunities to capture amazing camel riding photos.
Take a lot of photos. The more photos you take, the more you will learn. Take as many photos as you can, and then go back and review them. Look for the shots that work the best and study them. Take note of what you did right and what you could have done better.
Learn from your mistakes. Don’t get discouraged if your photos do not turn out as expected. Instead, use them as an opportunity to learn from your mistakes. Take note of what went wrong and how you could have improved the shot. Then, use that knowledge to do better the next time.
Join a photography group. Join a photography group or find a mentor who can provide you with feedback and guidance. Share your photos, ask for feedback, and learn from other photographers. This will help you improve your skills and develop your own style.
Remember, practice is the key to becoming a great photographer. Keep practicing, trying new things, and pushing yourself to improve. With dedication and hard work, you can capture amazing camel riding photos that will be cherished for years to come.
Conclusion
In conclusion, capturing amazing camel riding photos requires a combination of proper planning, attention to detail, and experimentation. It’s important to prepare and plan ahead of time to ensure that you’re ready to capture the perfect shot. Utilize the golden hours of photography to take advantage of the best lighting conditions, and experiment with angles and perspectives to find unique and interesting ways to capture the camels in action.
Don’t forget to focus on the camels’ expressions and movements, as well as the landscape in the background. Pay attention to lighting and shadows to create depth and dimension in your photos. Using a fast shutter speed can help you capture action shots, and incorporating filters and editing techniques can add an extra level of creativity to your photos.
Remember, practice makes perfect. Don’t be afraid to experiment and try new things in order to improve your photography skills. With these tips, you’ll be well on your way to capturing amazing camel riding photos that will impress your friends and family. So get out there, plan your shots, and start snapping away!
Frequently Asked Questions
Question 1?
What kind of camera gear do I need for camel riding photography?
Question 2?
How can I ensure my safety while shooting from a moving camel?
Question 3?
What type of clothing is best for camel riding photography?
Question 4?
How do I approach the camels for a good shot without scaring them?
Question 5?
How can I capture the personality of the camels in my photos?
Question 6?
What are some creative ways to incorporate the desert landscape into my photos?
Question 7?
What is the best time of day to take camel riding photos?
Question 8?
How can I capture action shots of the camels while they are moving?
Question 9?
What are some post-processing techniques I can use to enhance my camel riding photos?
Question 10?
What is the most important thing to keep in mind when photographing camels?